Fall in Western North Carolina is Magical
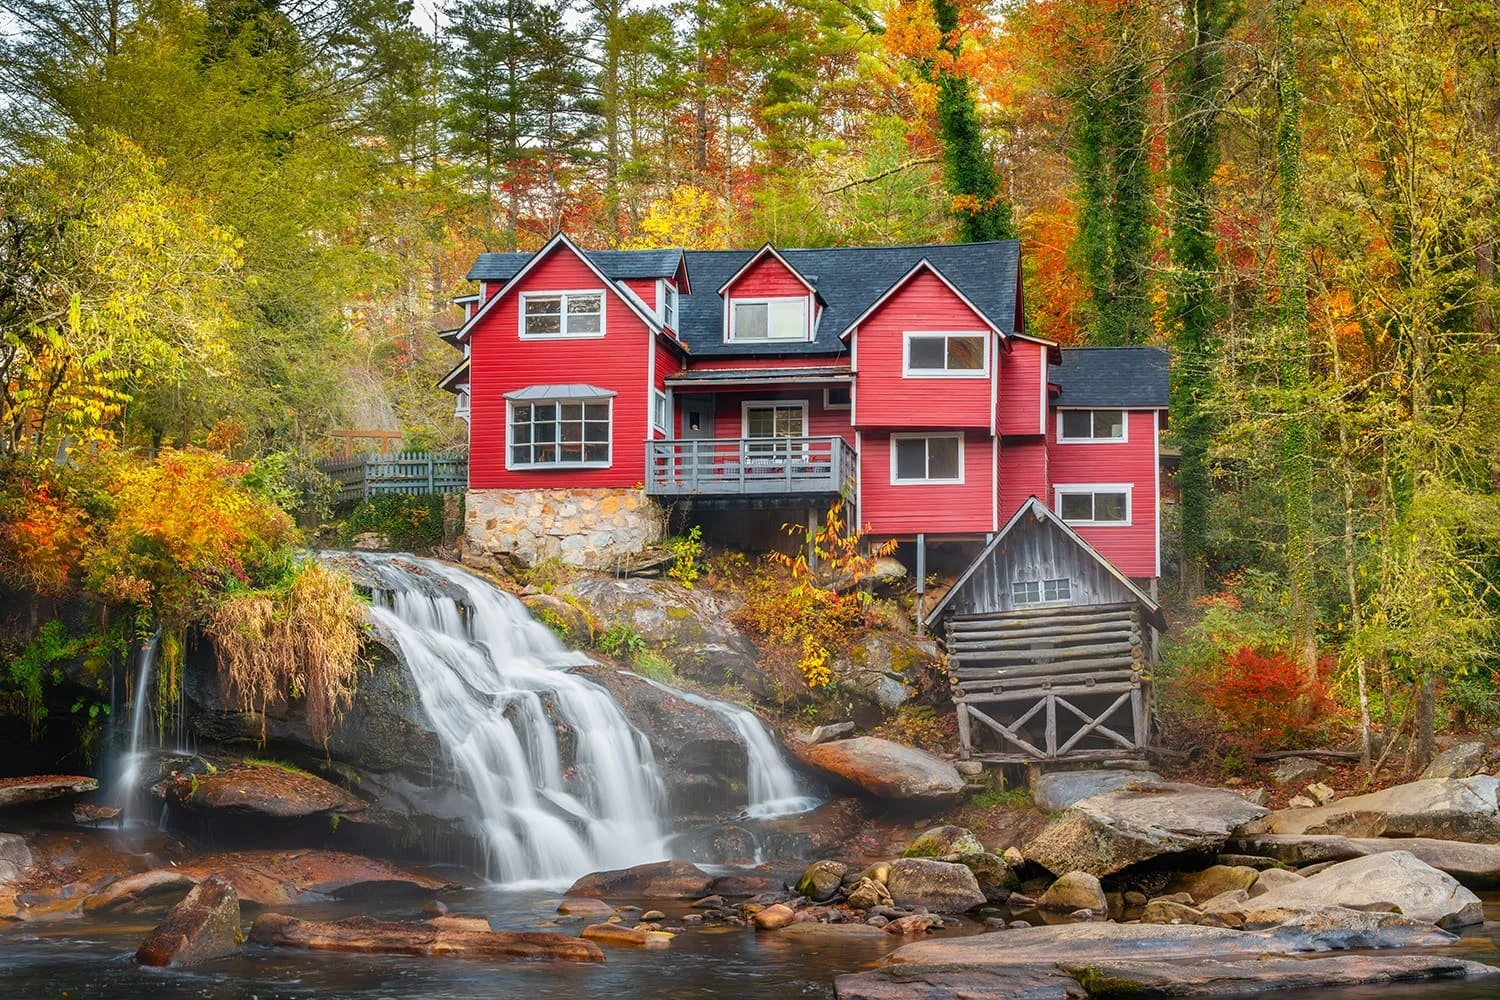
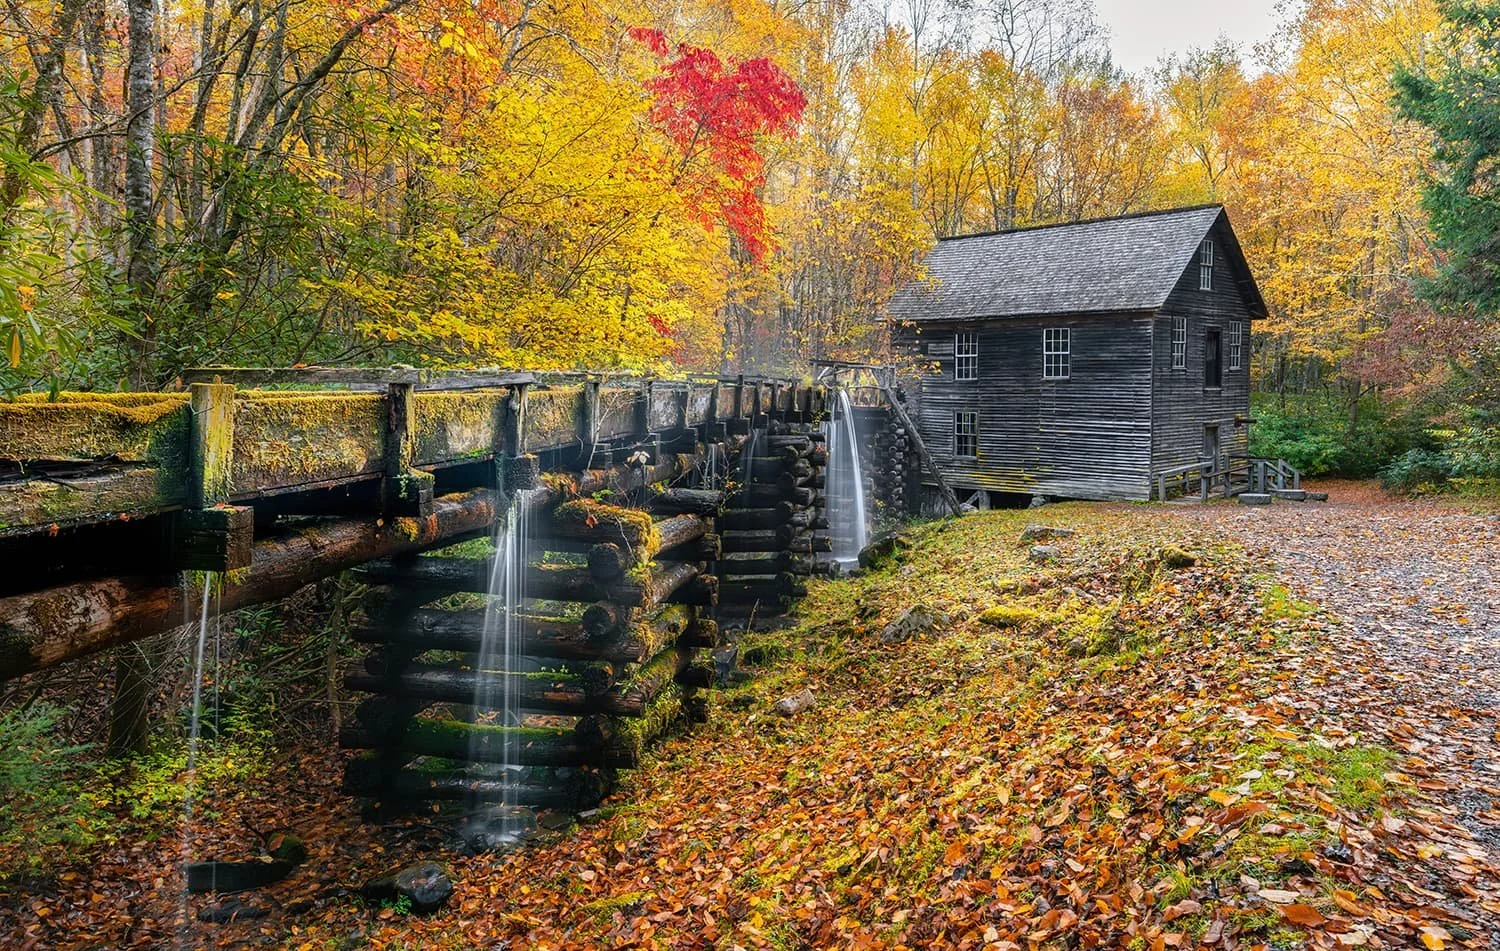
Autumn colors surround the historic red mill house at French Broad Falls in Balsam Grove, North Carolina.
Nikon Z8 + Nikon Z 24-120mm f/4 S @ 40mm, ISO 640, ½ sec, f/11
Please note: Some links on this page are affiliate links (including B&H and Adorama). This means I may earn a small commission if you purchase through those links—at no additional cost to you.
Western North Carolina offers some of the country's most vibrant fall foliage photography, with color moving gradually from the highest elevations into the valleys.
Peak color dates never repeat, which can make planning a fall photography trip challenging. Elevation is the primary driver of fall color timing, but temperature, moisture, and drought also play a role.
Cool, crisp autumn nights and sunny days can accelerate the process and brighten colors. Unseasonably warm weather can slow it down. Severe drought can cause leaves to drop early or turn brown, while heavy wind or rain can abruptly strip turning leaves from the trees.
In other words, even the best-planned fall photography trip requires some flexibility.
Tips for Planning a Great Fall Photography Trip
Start with your main focal point of interest. Is there a certain waterfall you have always wanted to photograph? Maybe the Blue Ridge Parkway is your primary goal. Or perhaps the elk bugling in Cataloochee Valley is calling your name. Whatever it is, start there.
Do a little research to see when that location has reached peak color during the last few years. This gives you a general framework for choosing your travel dates. Next, decide how far you are willing to drive from your main destination and start looking for other photography locations along the way. I recommend having a list of five to seven potential photo locations rather than planning every minute of your trip.
In my experience, you sometimes have to drive to find the color. Up, down, and around the mountain. One side of a mountain can be past peak, while a 15-minute drive can put you right into vibrant, peak color. I have found this especially true along the Blue Ridge Parkway. Building a flexible list of five to seven locations dramatically increases your chances of finding the brilliant fall color you are looking for.
Plan to arrive early if you can. The best light and the best photography opportunities often happen early in the morning, before the crowds arrive. You'll also have a better chance of finding parking and getting the location to yourself, especially at popular waterfalls and Blue Ridge Parkway overlooks.
Most importantly, enjoy the journey.
Western North Carolina can be a magical place, full of restorative energy that seems to replenish your soul. Beyond stunning mountain views, waterfalls, and wildlife, you'll find plenty of good food, roadside attractions, and great people along the way.
Brevard, North Carolina: The Land of Waterfalls
With more than 250 waterfalls in the surrounding area, Brevard is known as the “Land of Waterfalls.” During autumn, those waterfalls are framed by layers of brilliant red, orange, and gold foliage.
Brevard makes an excellent base camp for a Western North Carolina fall photography trip. One of its biggest advantages is its location. From Brevard, you can reach both lower- and higher-elevation photography locations without spending hours in the car.
Brevard sits at roughly 2,200 feet, while nearby roads quickly climb into the surrounding mountains. That makes it possible to chase changing fall color simply by changing elevations. US-276 north out of Brevard takes you directly into Pisgah National Forest, with Looking Glass Falls providing an easy roadside waterfall stop along the way.
And don't overlook Brevard itself.
The town is famous for its white squirrels and has a charming downtown with an easygoing Appalachian feel. With a good mix of restaurants, shops, and local character, Brevard is a great place to unwind after a long day of chasing waterfalls and fall color.
Best Time to Visit
Mid-to-late October, typically October 12–26
Best Photo Spots Nearby
Looking Glass Falls — about 20 minutes
Hooker Falls — about 20 minutes
French Broad Falls — about 25 minutes
Upper Whitewater Falls — about 40 minutes
Dry Falls — about 1 hour
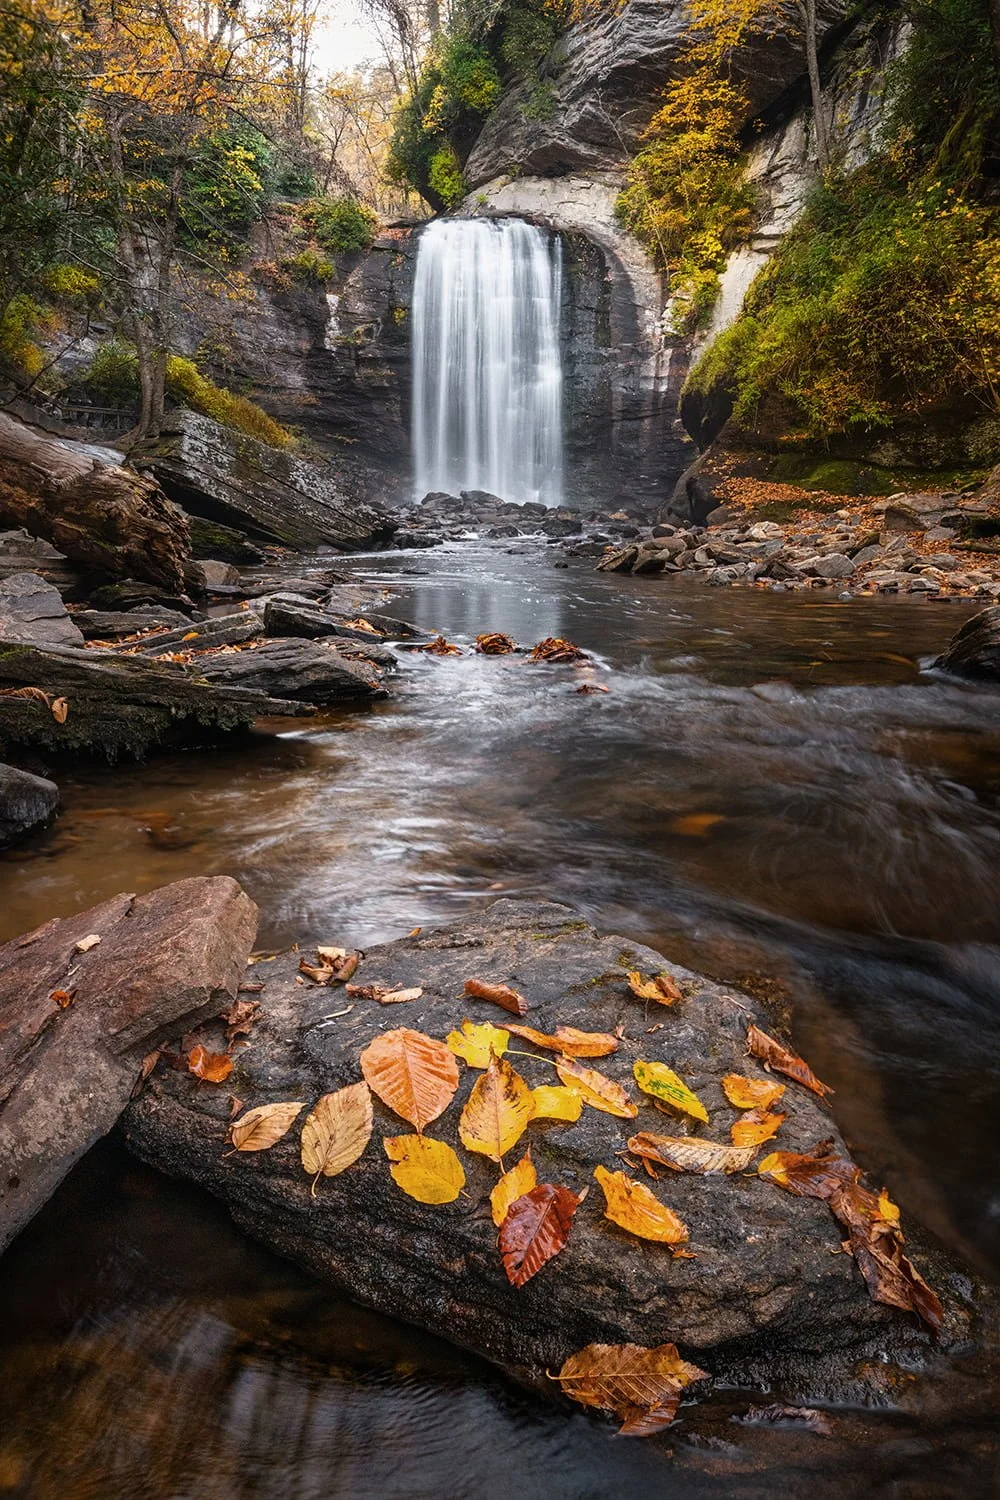
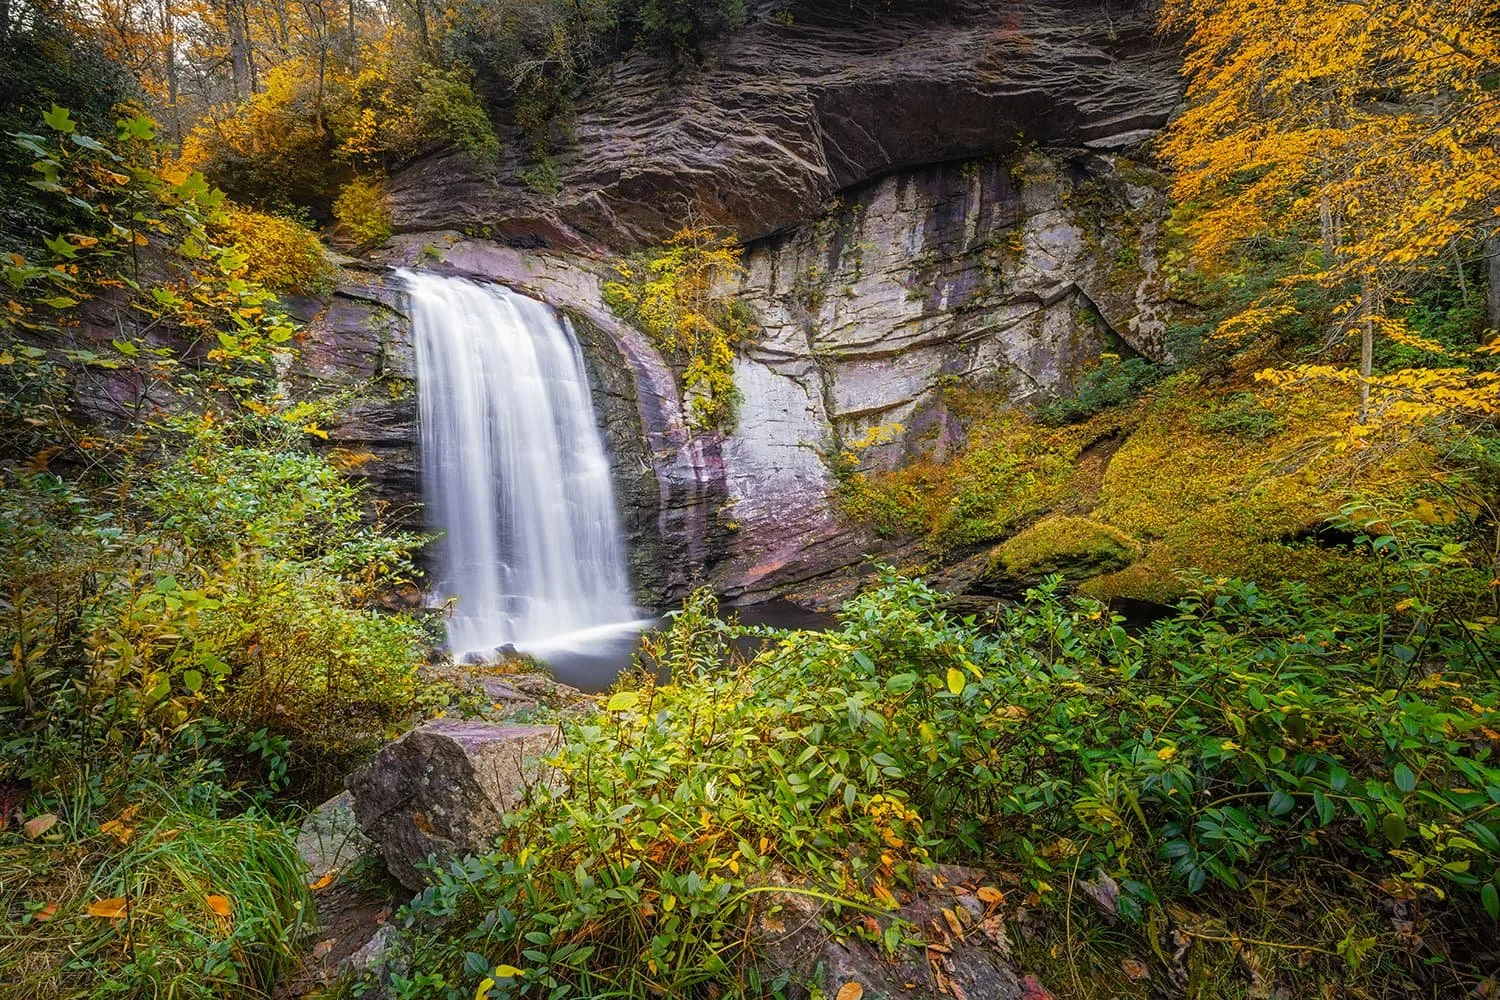
A quiet moment of fall detail—vibrant leaves and rugged stone leading the eye toward the majesty of Looking Glass Falls.
Nikon Z8 + Nikon Z 14-30mm f/4 S @ 28mm, ISO 800, ½ second, f/11
Looking Glass Falls
Capturing Looking Glass Falls in autumn is a must for any Western North Carolina photography trip.
About 6 miles north of Brevard on US-276, this iconic waterfall is one of the region’s easiest to photograph. Fall color adds another layer of interest as the surrounding Pisgah National Forest canopy turns shades of gold, orange, and red.
One of the biggest advantages of Looking Glass Falls is its roadside location. You can photograph this approximately 60-foot waterfall with virtually no hiking, making it an excellent early-morning stop when you want to maximize your photography time.
I have a separate guide dedicated to Looking Glass Falls with more detailed information about visiting and photographing the waterfall.
Best Time to Visit
Mid-to-late October, typically October 19–26
Best Photo Spots Nearby
Moore Cove Falls — about 5 minutes
Blue Ridge Parkway — about 20 minutes
Hooker Falls, DuPont State Recreational Forest — about 30 minutes
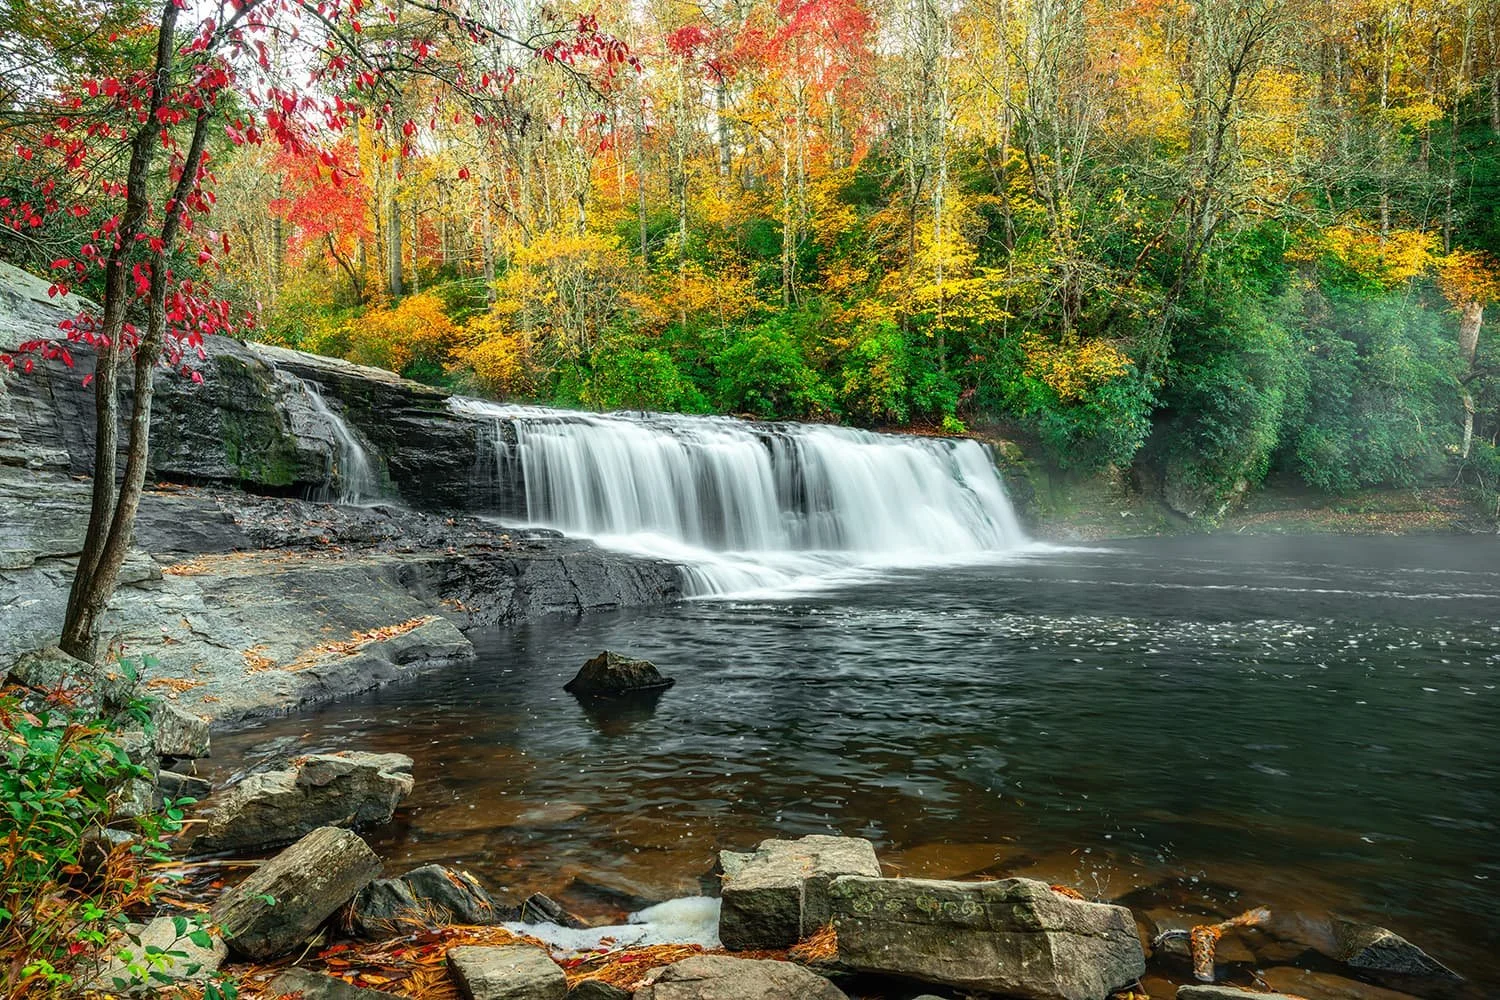
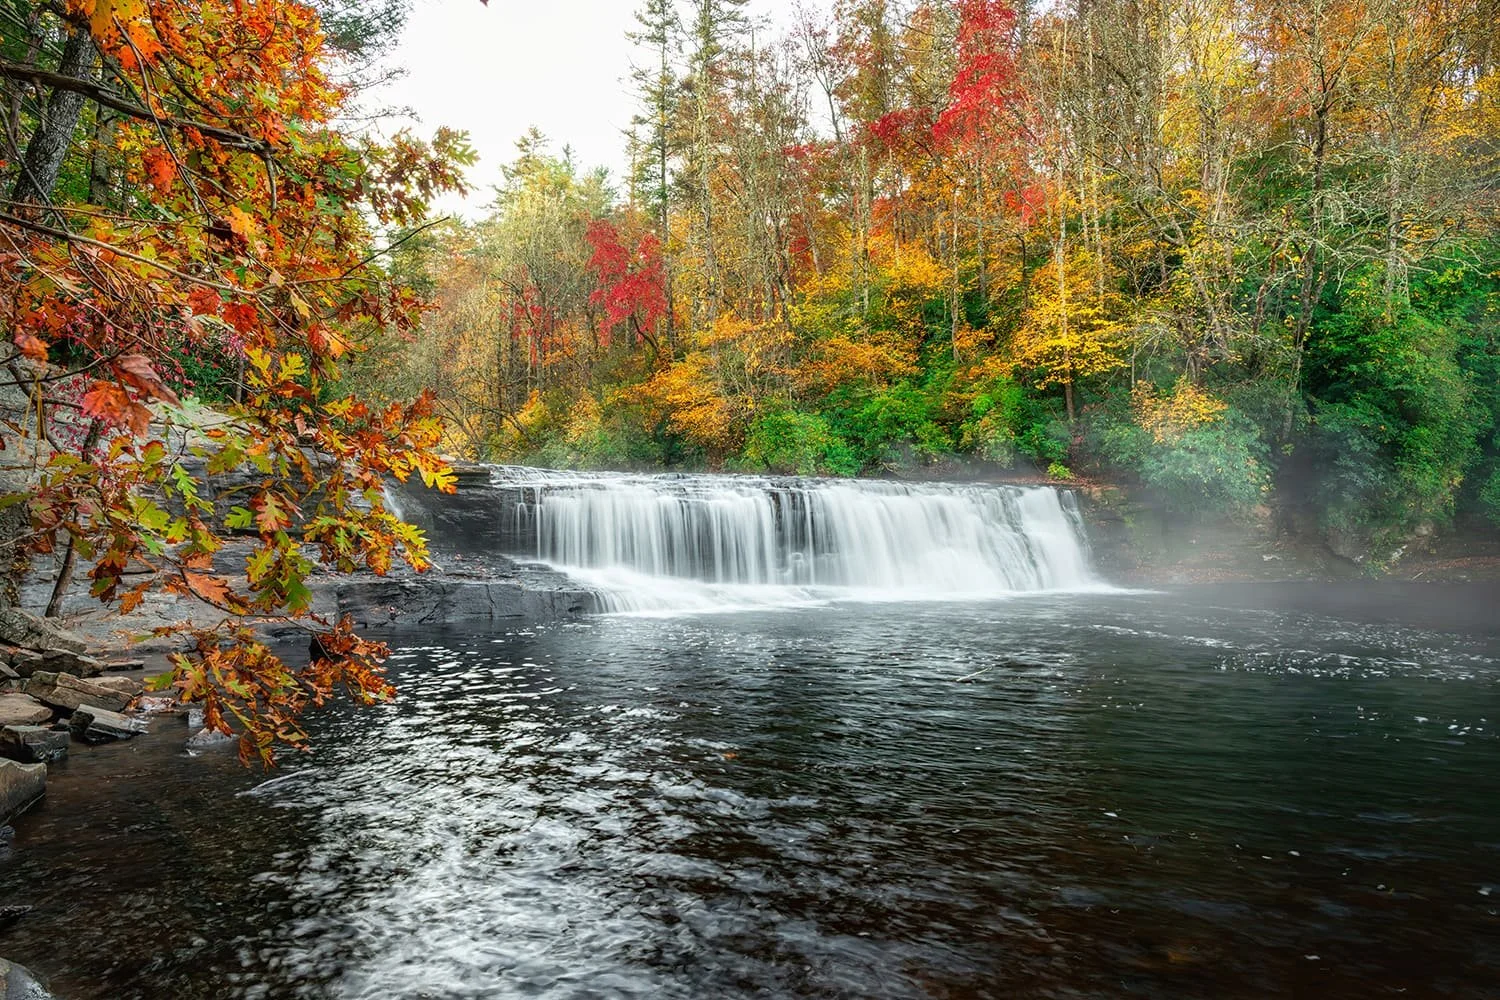
Brilliant autumn hues surround the rushing waters of Hooker Falls in Western North Carolina.
Nikon Z8 + Nikon Z 24-120mm f/4 S @ 24mm, ISO 250, ½ second, f/10
Hooker Falls in DuPont State Recreational Forest
Located about 20 minutes from downtown Brevard, DuPont State Recreational Forest is a great place to discover why this region is known as the Land of Waterfalls.
Hooker Falls, Triple Falls, and High Falls make a classic waterfall combination along the Little River. Hooker Falls itself is not tall. At only about 12 feet, it makes up for its lack of height with width, water volume, and setting. Its broad cascade drops into a large plunge pool surrounded by rocks and forest. Flat rocks around the edge can provide useful foreground elements and different angles for photography. A dense Appalachian hardwood forest frames the waterfall, with oak, tulip poplar, hemlock, rhododendron, and mountain laurel providing plenty of fall color and texture.
Hooker Falls is accessed by a short walk from the Hooker Falls Access Area, making it one of the easier waterfall photography locations in the area. Restrooms are also available near the parking area.
The parking area can fill quickly during peak fall color, so arriving early pays off.
Best Time to Visit
Mid-to-late October, typically October 15–25
Best Photo Spots Nearby
Looking Glass Falls — about 30 minutes
French Broad Falls and Mill Shoals Falls — about 50 minutes
Upper Whitewater Falls — about 1 hour
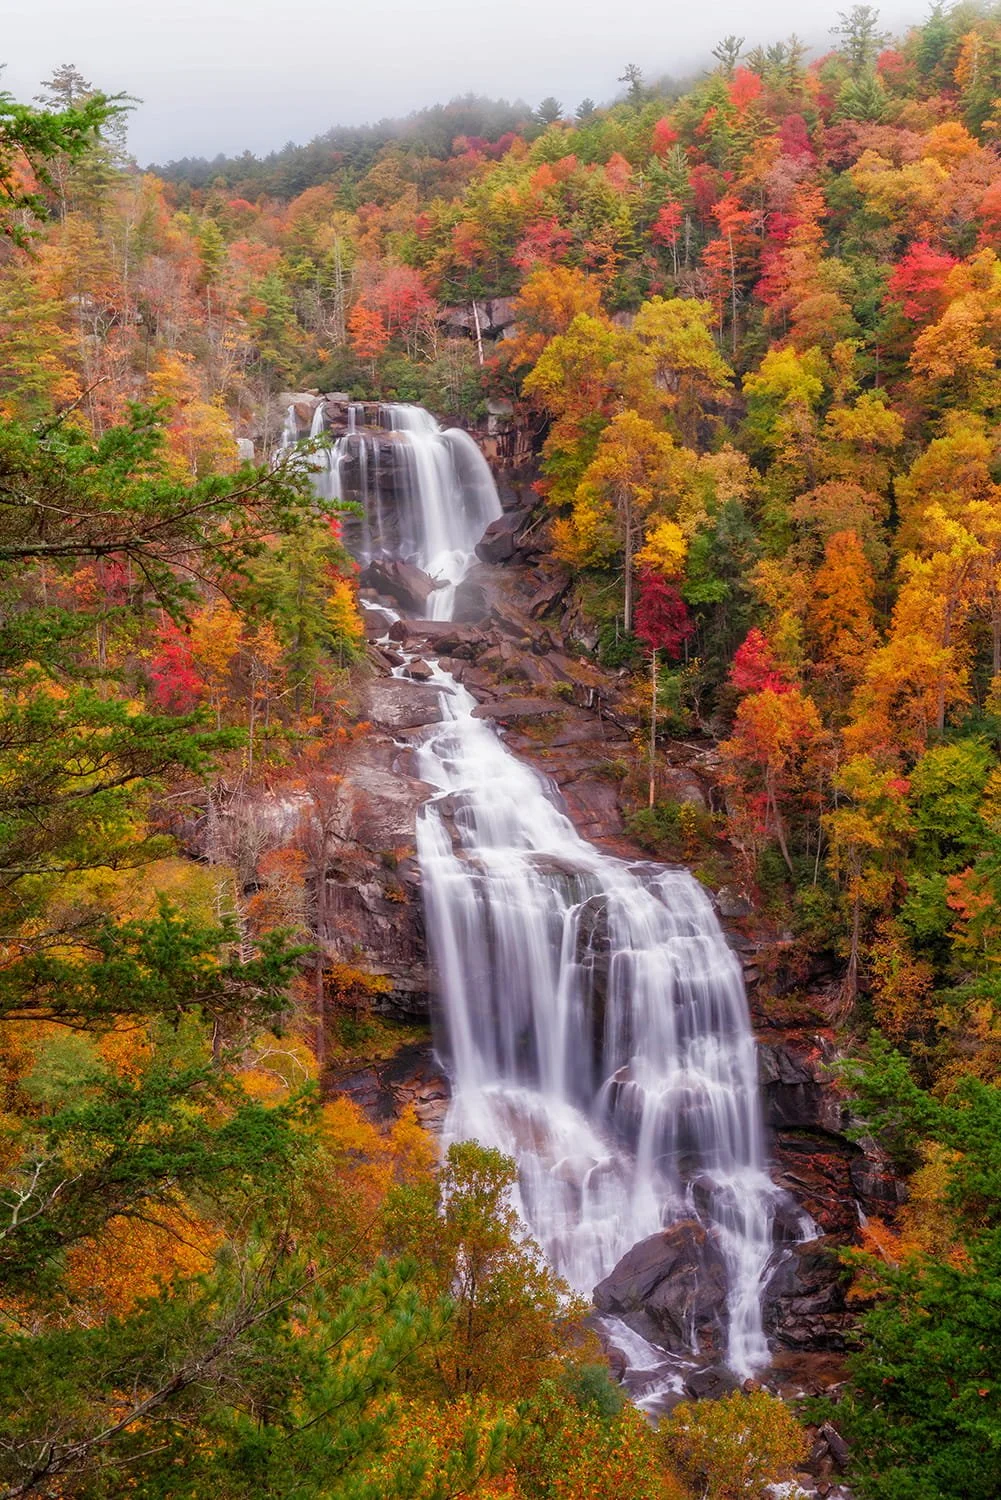
Upper Whitewater Falls-Where the roar of the falls meets the brilliance of autumn, creating a stunning seasonal masterpiece.
Upper Whitewater Falls
One word describes Upper Whitewater Falls: Epic.
Located in the Nantahala National Forest near Sapphire, North Carolina, Upper Whitewater Falls drops approximately 411 feet and is one of the most spectacular waterfalls in the eastern United States.
The waterfall has two primary viewing areas: an upper overlook and a lower overlook. A paved path from the parking area leads to the upper viewing area. From here, the surrounding tree canopy frames the waterfall like a giant picture window. It makes for an excellent composition, especially when the surrounding foliage is at peak color.
For a more direct, front-facing view, continue down to the lower viewing platform.
The lower overlook requires a long descent down a wooden staircase. The trip down is relatively easy, but remember that every step you take down will eventually have to be climbed back up. The reward is worth the effort. The lower platform puts you almost directly across from the center of the cascade, offering a more immersive view of the waterfall and gorge.
The lower viewing area can become crowded quickly during peak fall color. If you plan to use a tripod, arrive early. Keep in mind that the climb back up can be moderately strenuous. Visitors may stop along the staircase to rest, creating occasional bottlenecks.
This is a popular destination, so be patient and courteous. Everyone is there trying to enjoy the same incredible view.
Best Time to Visit
Mid-to-late October, typically October 15–28
Best Photo Spots Nearby
Silver Run Falls — about 15 minutes
French Broad Falls and Mill Shoals Falls — about 50 minutes
Dry Falls — about 1 hour
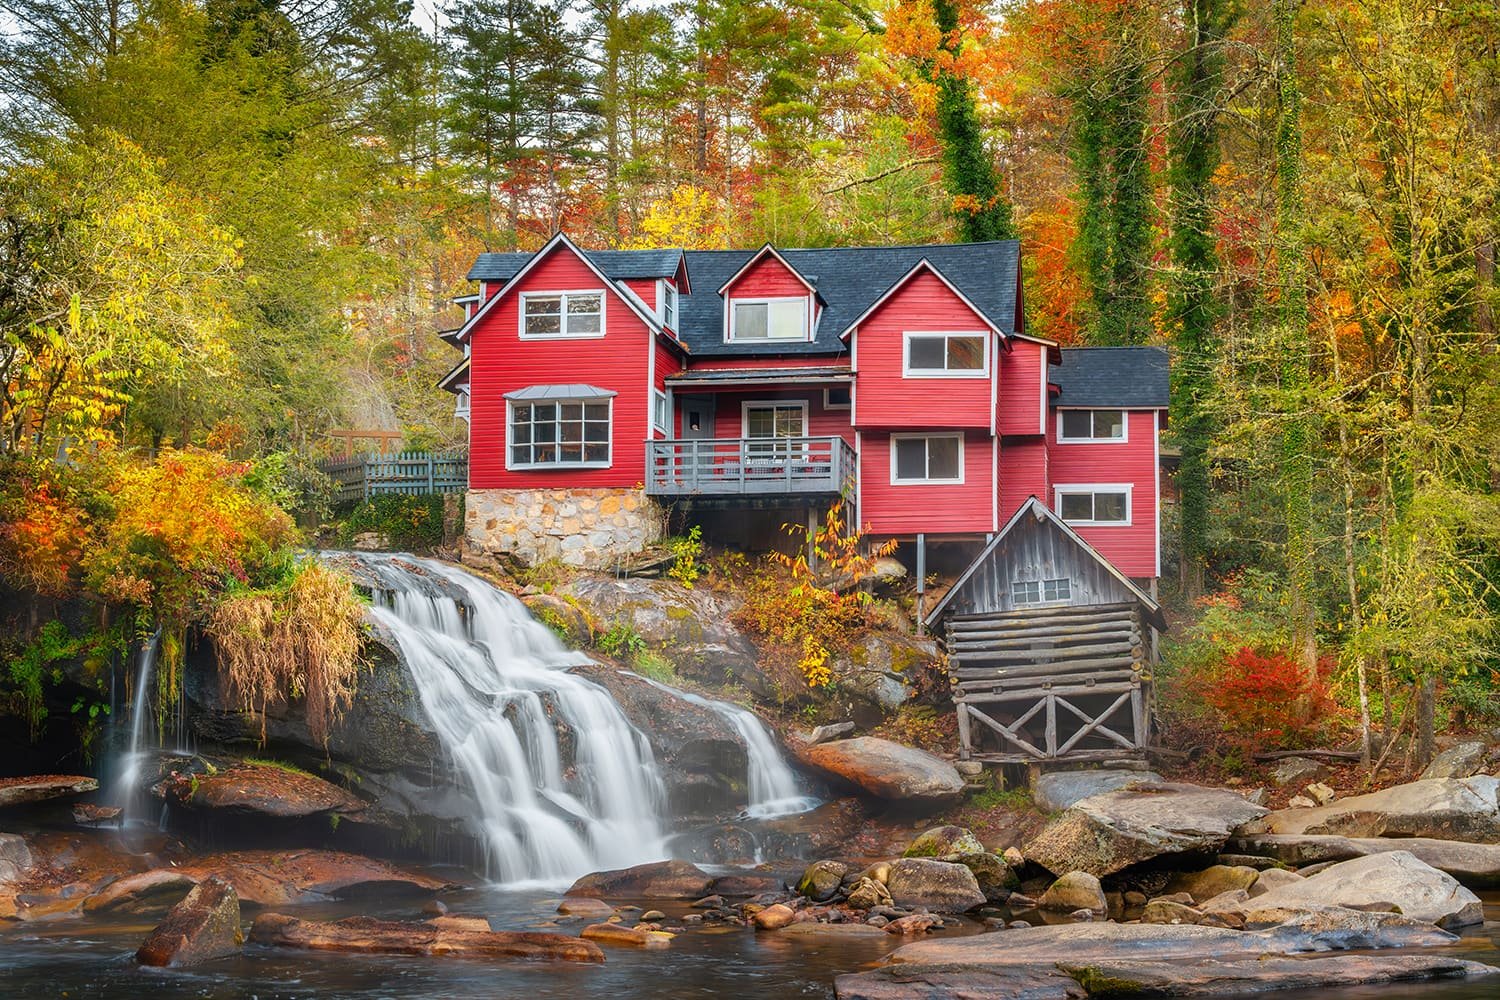
A stunning autumn day at the red mill house, where the vibrant fall foliage meets the rushing waters of French Broad Falls.
Nikon Z8 + Nikon Z 24-120mm f/4 S @ 40mm, ISO 640, ½ sec, f/11
French Broad Falls and Mill Shoals Falls
Located along NC-215, the Forest Heritage Scenic Byway, in Balsam Grove, these twin waterfalls are surprisingly easy to miss.
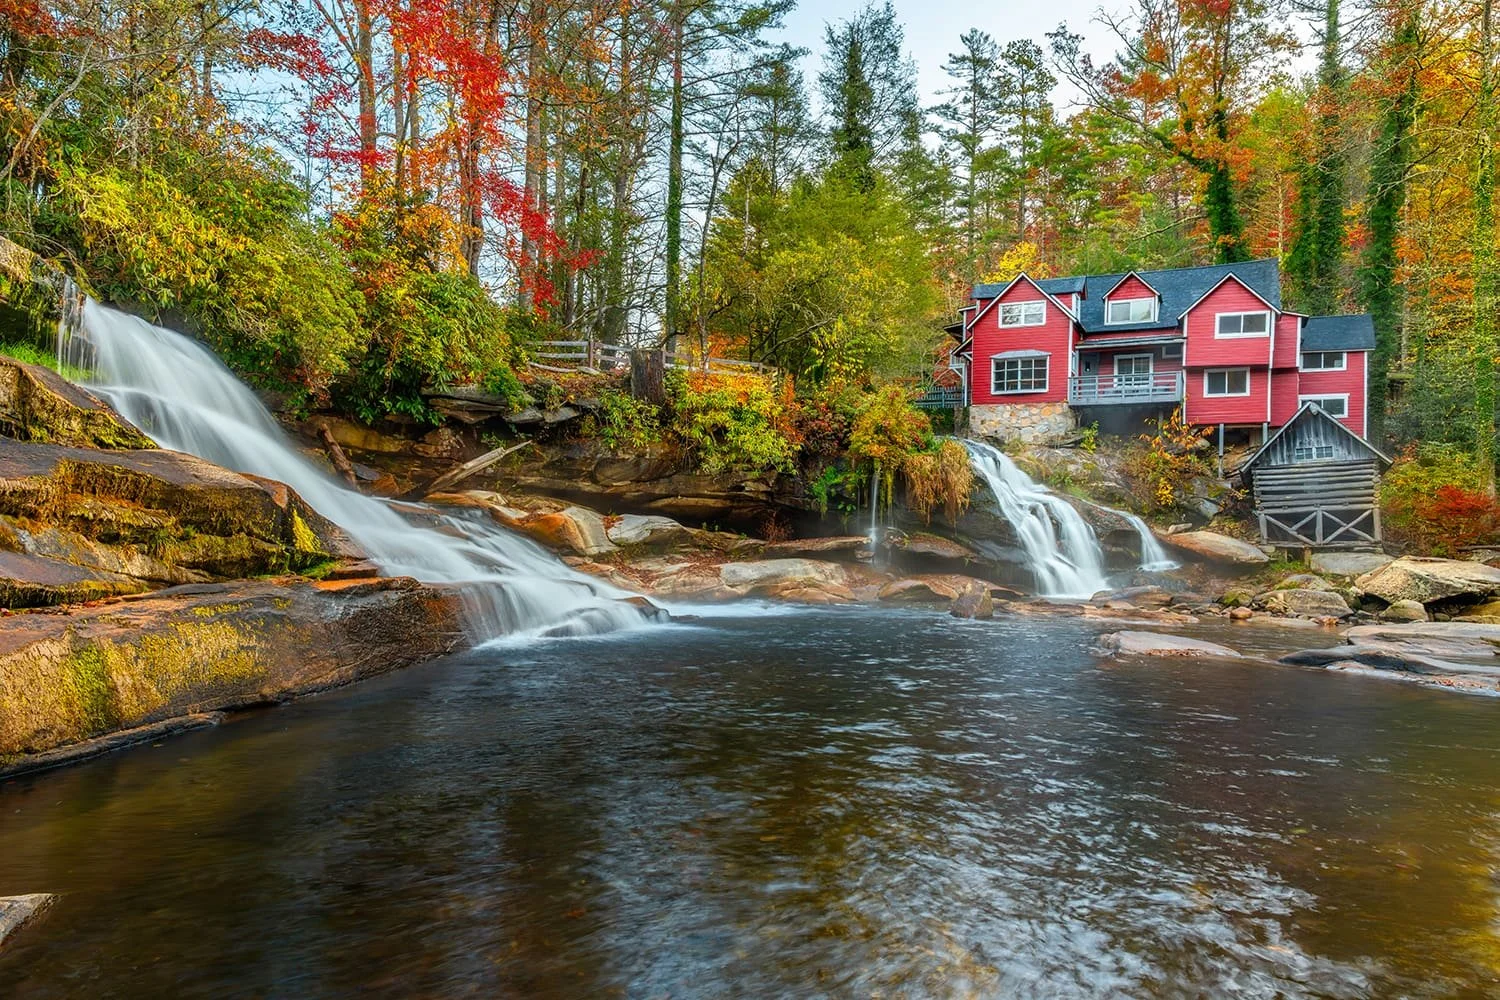
French Broad Falls and Mill Shoals Falls are relatively small, dropping roughly 15 feet, but their setting makes them especially photogenic. Mill Shoals Falls flows beside an old, weathered red mill structure, creating a timeless Appalachian scene. French Broad Falls spills over a wide, low ledge, creating a completely different look.
The waterfalls are located on private property belonging to Living Waters Ministry, which graciously allows visitors to access the falls at their own risk. Be respectful of the property and follow any posted instructions. Roadside parking is available near the entrance, followed by a short trail down to the river.
The trail is short and relatively easy, but the rocks around the waterfalls can be extremely slippery, even when they appear dry. Use caution. The boulders at the base of the falls provide the primary photography area and are responsible for many of the images you see of this location. The position creates an unusual compressed perspective, with the mill and waterfall appearing close together in the frame.
For my front-facing composition, I crossed the river.
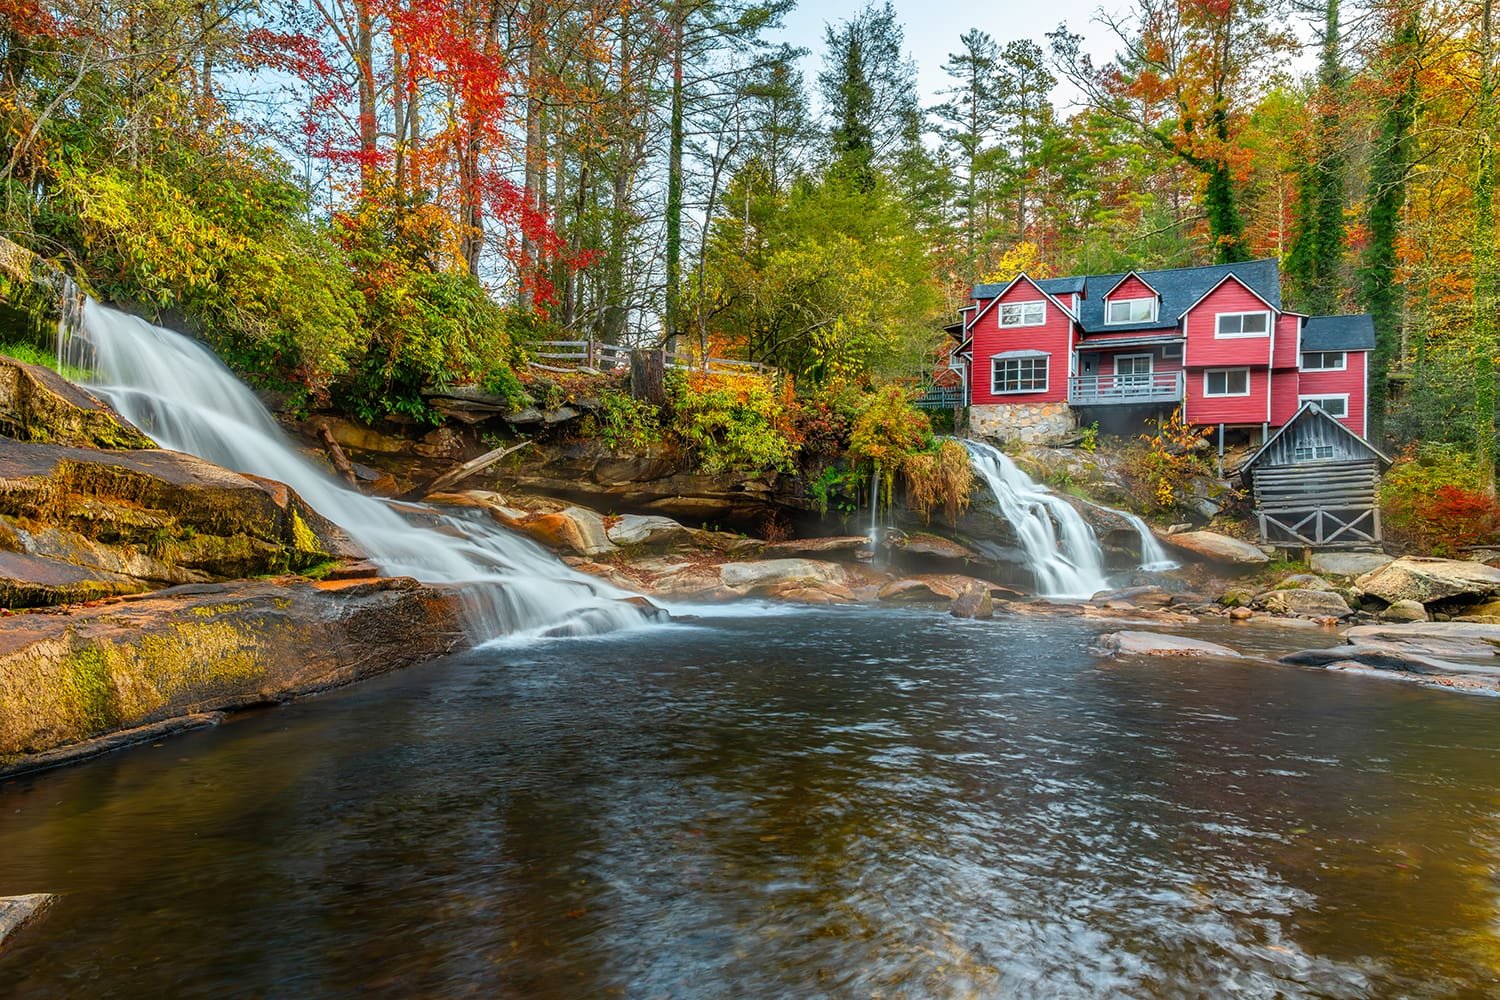
A wide view of the historic red mill house, capturing both French Broad Falls and Mill Shoals Falls in one frame.
Nikon Z8 + Nikon Z 24-120mm f/4 S @ 24mm, ISO 320, ½ second, f/13
An Important Note for Photographers
While the head-on photograph shown above was captured by carefully crossing to the opposite bank during low-flow conditions in October, I strongly discourage attempting this river crossing.
The convergence of Shoal Creek and the North Fork of the French Broad River can create strong currents, and the underwater rocks are coated with algae that can be extremely slick. One wrong step could result in a dangerous fall or submerged camera gear.
If you decide to enter the water, you do so entirely at your own risk. Never attempt a crossing during or after significant rainfall, secure your camera equipment in a waterproof backpack, and use appropriate footwear.
Most importantly, no photograph is worth risking your safety or expensive camera equipment.
When I decided to cross in October 2025, I planned carefully by checking water conditions and bringing water shoes. I rolled my pants up to my knees, put on my water shoes, and secured my backpack. I extended the legs of my tripod but kept them together so I could use the tripod like a walking stick.
Let me tell you: that water was cold.
I took my time and searched for solid footing with every step. The depth was extremely uneven, with pockets where the water came nearly to my knees. Even at relatively low flow, the current was surprisingly strong. By keeping my legs bent and lowering my center of gravity, I made it across without a misstep. Once I reached the opposite bank, a large flat rock gave me a perfect place to work from. I took my time and made sure I had captured everything I wanted before heading back.
When I stepped safely onto the main bank, the sheer relief was immediately swallowed up by absolute elation.
After three previous trips where the autumn foliage simply refused to cooperate, finally capturing that perfect blend of peak October color and a perfectly framed millhouse made every slick step seem worth the wait.
Best Time to Visit
Mid-to-late October, typically October 15–28
Best Photo Spots Nearby
Cathedral Falls — about a ¼-mile walk downstream
Sunburst Falls — about 30 minutes
Devils Courthouse Overlook — about 25 minutes
Black Balsam Knob — about 30 minutes
Graveyard Fields — about 30 minutes
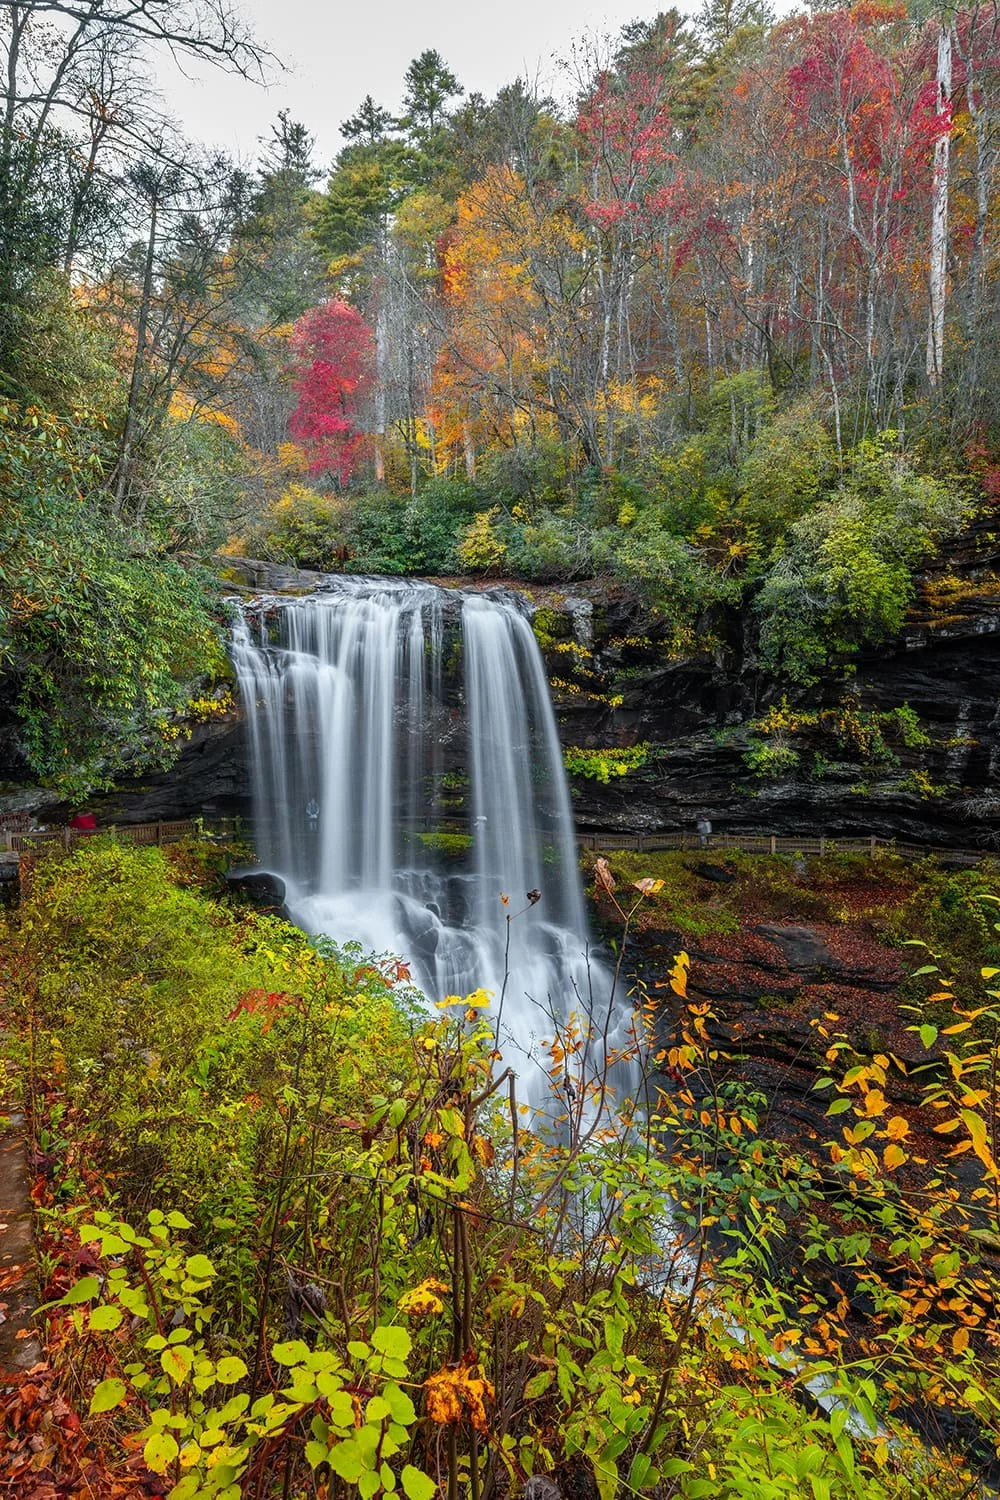
The first hints of autumn emerge amid the dramatic spillover of Dry Falls.
Nikon Z8 + Nikon Z 14-30mm f/4 S @ 20mm, ISO 200, ½ sec, f11
Dry Falls
Dry Falls is a spectacular 75-foot waterfall along US-64 in the Cullasaja Gorge between Franklin and Highlands, North Carolina.
What makes Dry Falls unique is the trail that allows you to walk behind the rushing curtain of water. From this vantage point, you see the world through a translucent screen of spray. The Cullasaja River’s force vibrates through the stone beneath your feet, while a perpetual cool mist fills the air.
Photography at Dry Falls is famously deceptive.
Because you can drive directly to the parking area and take a short paved trail to the falls, it looks incredibly easy. In reality, several photography challenges remain.
The paved walkway has prominent safety railings, so creating a natural-looking landscape composition without including the handrails takes some work. Add steady visitor traffic and finding the perfect composition can become surprisingly difficult. Then there is the mist. Despite its name, Dry Falls is anything but dry.
As you approach the waterfall, the spray becomes increasingly intense. Keep a microfiber cloth handy and be prepared to wipe your lens frequently. You’ll also face a major dynamic-range challenge. The waterfall sits in a deep, shaded gorge, creating a difficult mix of brilliant whitewater and deep shadows. Without careful exposure, the waterfall can become a textureless white streak while the surrounding rock disappears into darkness.
If photographing Dry Falls is a priority, here are a few tips.
Arrive early. Early morning gives you a much better chance of avoiding crowds and gives you more creative freedom along the walkway. Start at the upper overlook near the parking area. This viewpoint is often overlooked and provides a broader perspective of the waterfall and surrounding gorge. And, as always, protect your camera from the mist.
The road to Dry Falls travels through the steep Cullasaja River Gorge and is narrow and winding in places. Drive carefully and watch for traffic. The parking area can fill quickly during peak visitation, and traffic backups can occur on US-64. If the lot is full, don't stop or idle on the highway and block traffic.
I haven’t yet caught Dry Falls at peak fall color.
Maybe this will be the year.
Best Time to Visit
Early-to-mid October, typically October 11–20
Best Photo Spots Nearby
Cullasaja Falls — about 15 minutes
Glen Falls — about 15 minutes
Upper Whitewater Falls — about 1 hour
French Broad Falls and Mill Shoals Falls — about 1 hour
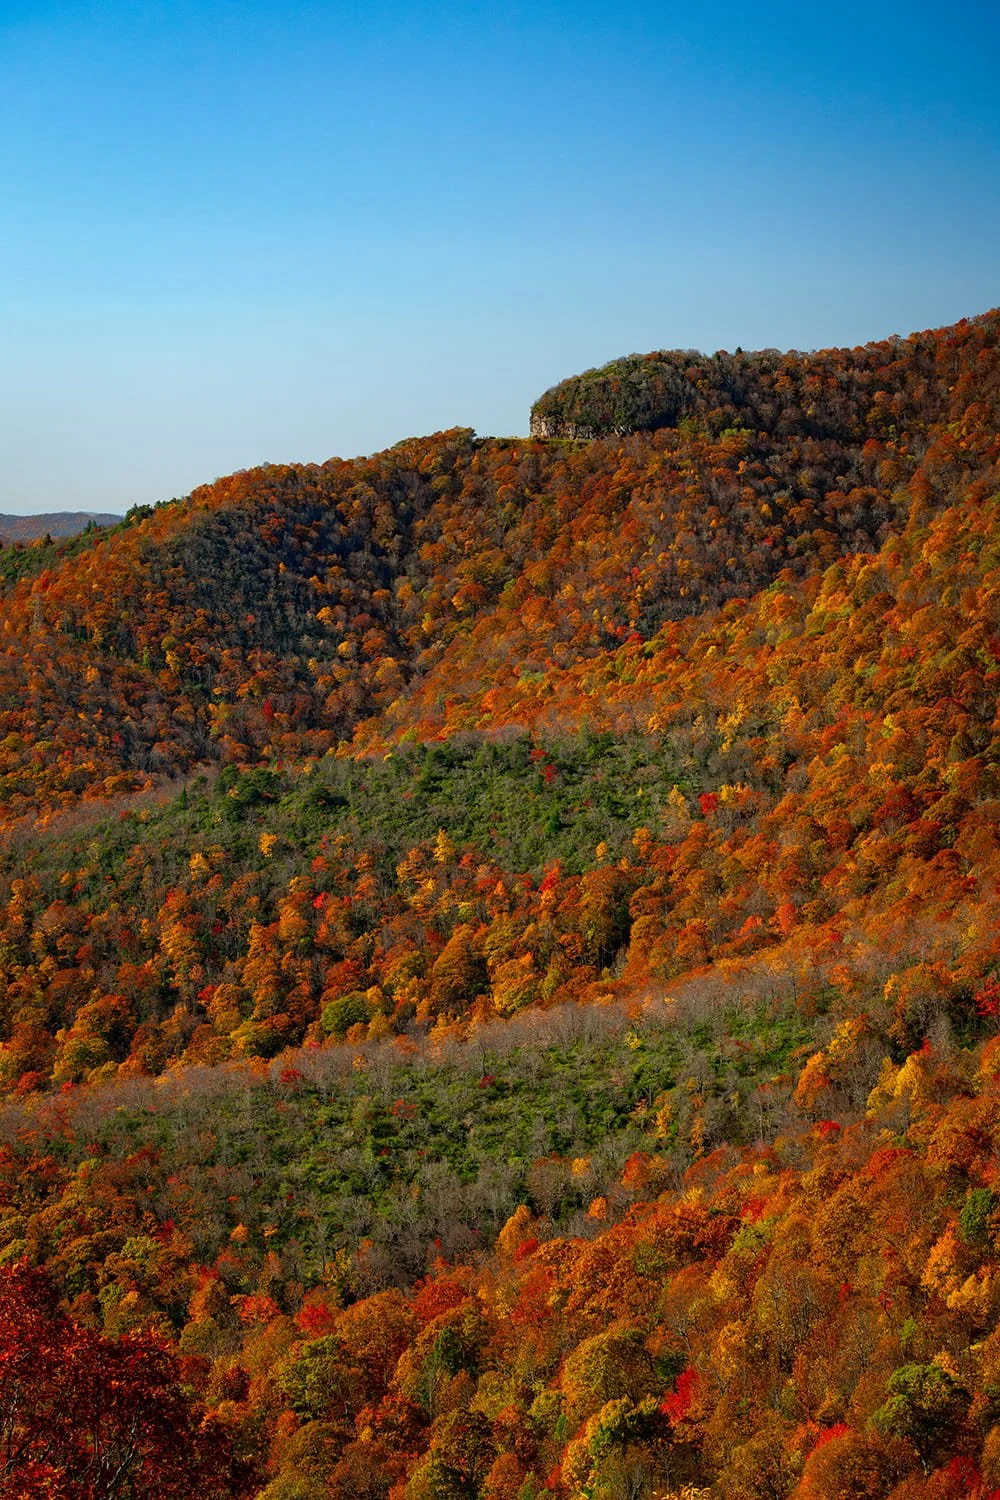
Blue Ridge Parkway Fall Photography
The Blue Ridge Parkway is a 469-mile scenic roadway through North Carolina and Virginia, connecting Shenandoah National Park with Great Smoky Mountains National Park.
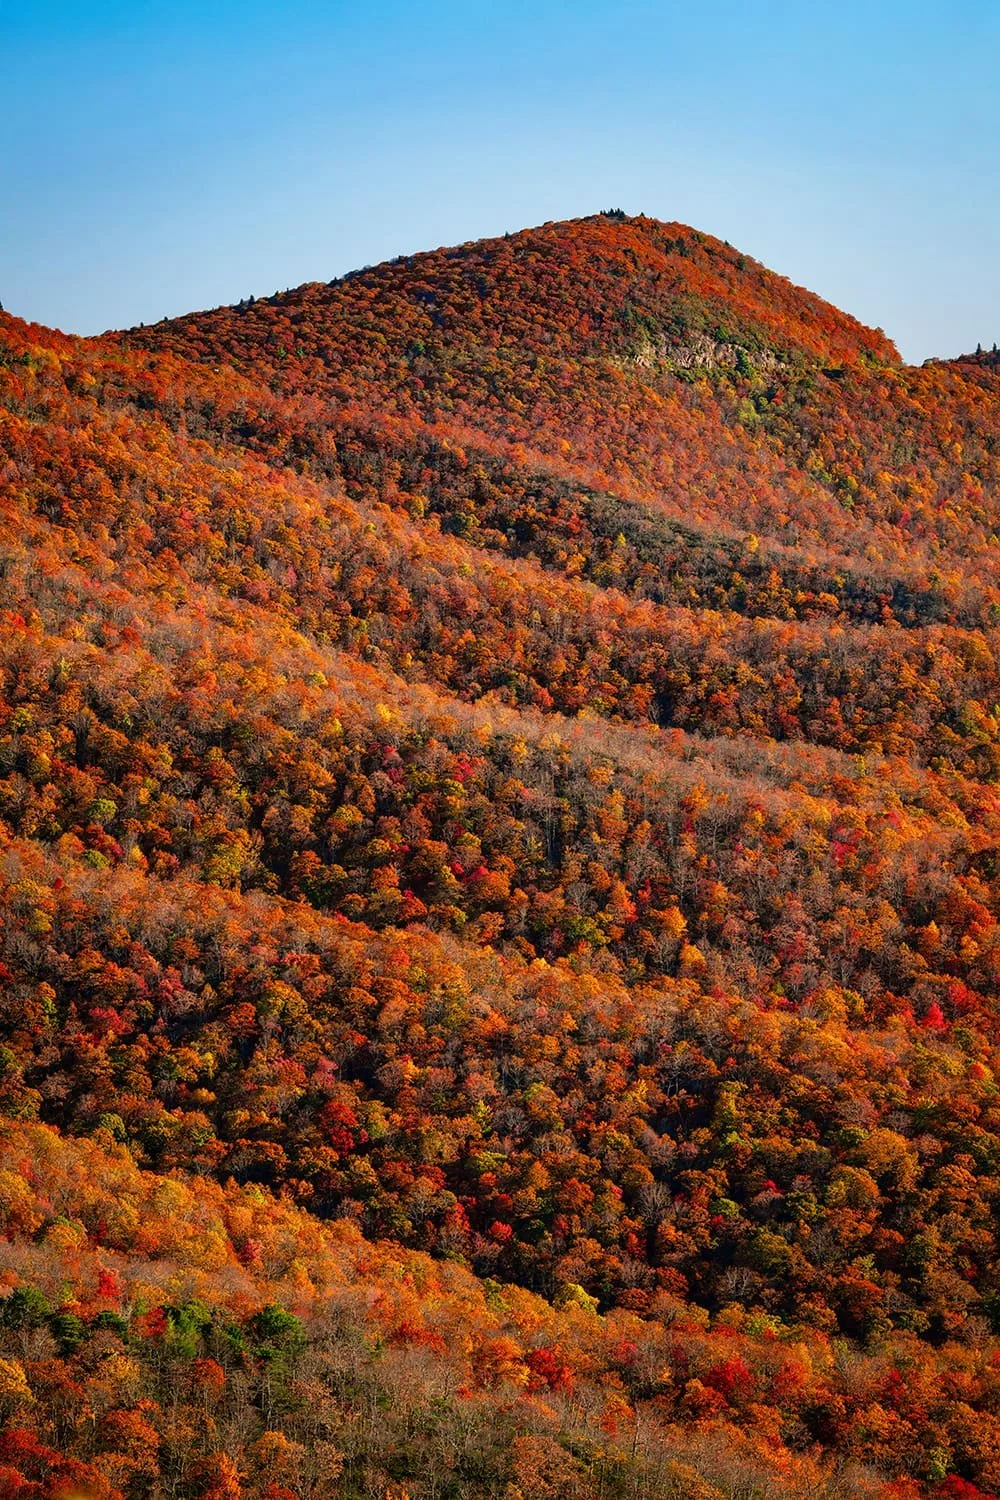
For fall photographers, it is one of the best places in the country to chase changing foliage. Peak color begins at the highest elevations and gradually moves downward as the season progresses. That means the Parkway can offer completely different photography opportunities from one section to another in a single day. Color intensity can also vary dramatically from mile to mile.
In autumn, the mountains become a living canvas painted in deep crimson, blazing orange and smoky gold. As color moves down the mountain like a slow wave, red maples blush, birches explode in brilliant yellow, and sourwoods turn rich shades of red and maroon. The air becomes crisp, often carrying the smell of damp earth, fallen leaves and faint wood smoke.
Beyond roadside overlooks, waterfalls, and hiking trails, the Parkway provides access to mountain communities, historic sites, restaurants, art galleries, crafts, and scenic drives.
The Blue Ridge Parkway can easily be woven into a Western North Carolina waterfall photography trip. You can structure your days as continuous loops, using waterfalls and other destinations as milestones while keeping your eyes open for unexpected pockets of peak color along the way.
Here are a few notable locations.
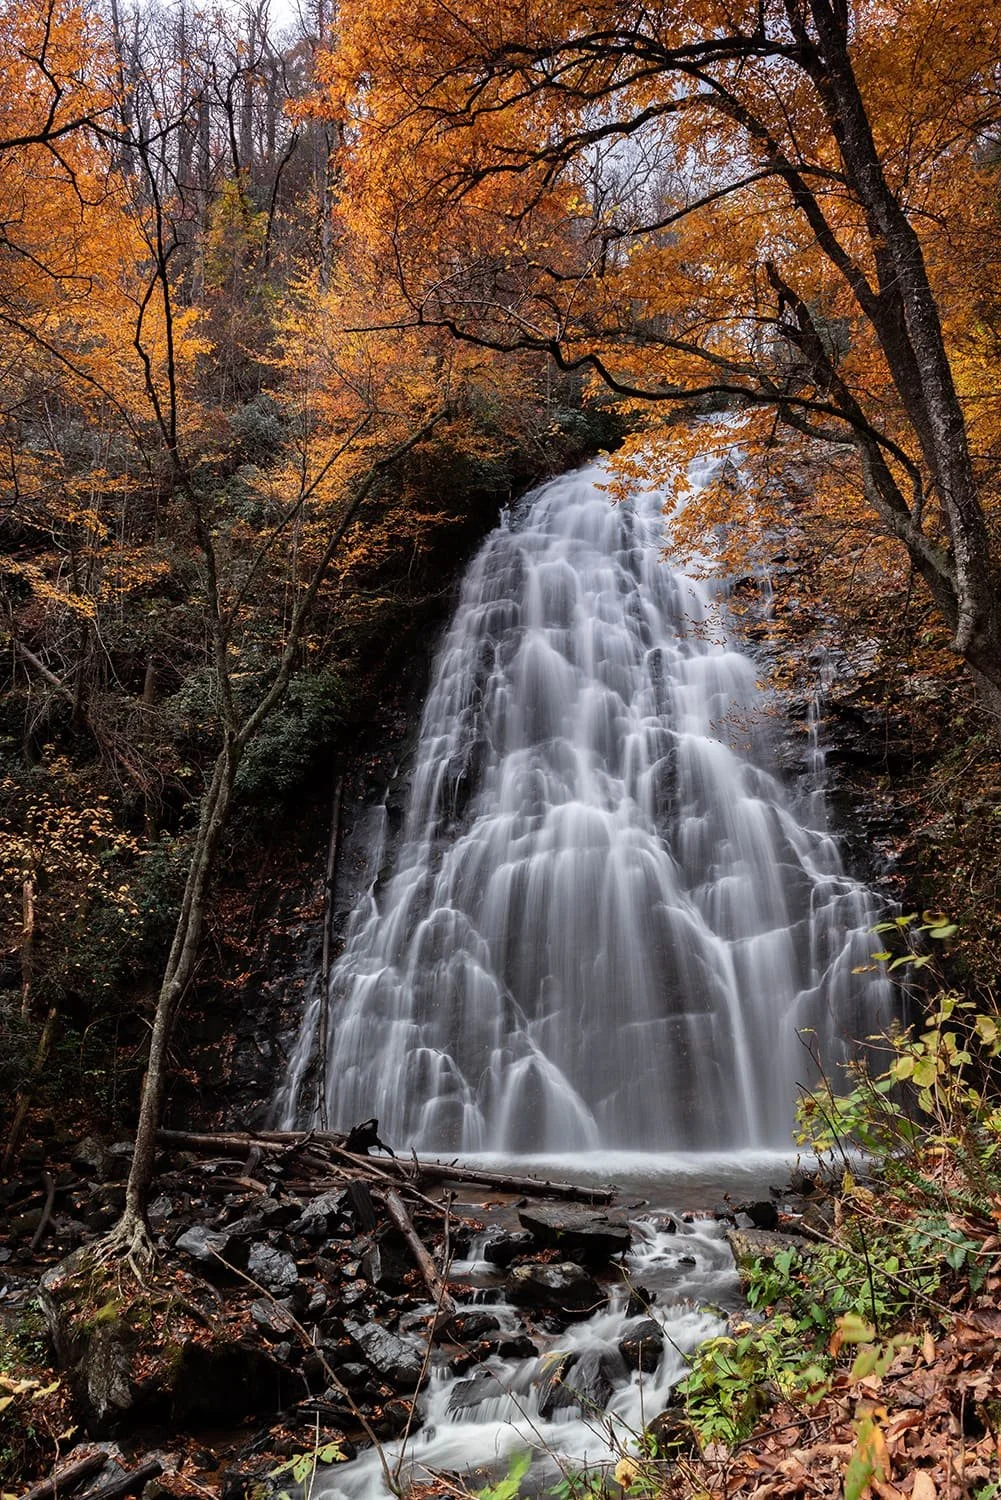
Vibrant orange autumn foliage framing the cascading waters of Crabtree Falls along the Blue Ridge Parkway.
Crabtree Falls — Blue Ridge Parkway Milepost 339.5
If you are looking for a hiking adventure with a great waterfall at the end, Crabtree Falls is a solid choice.
Located at Milepost 339.5 on the Blue Ridge Parkway, Crabtree Falls is a 60-foot waterfall reached by a scenic woodland trail. The loop is approximately 2.5 miles. The hike includes a steep descent to the base of the falls and, of course, the corresponding uphill climb on the return. The trail can be rugged, with roots, rocks, switchbacks, and uneven steps. The reward is a beautiful cascade flowing over a wide rock cliff.
Rhododendrons, ferns, and towering hardwoods surround the falls. A wooden bridge near the base provides a great viewing position and another potential foreground element.
Arrive early to beat the crowds, especially during peak fall color. Take your time exploring different compositions and protect your gear from mist. Wear appropriate footwear and be prepared for muddy trail sections.
Best Time to Visit
Mid-to-late October, typically October 15–25
Best Photo Spots Nearby
Historic Orchard at Altapass — about 35 minutes
North Cove Overlook — about 45 minutes
Chestoa View Overlook — about 1 hour
Linville Falls — about 1 hour
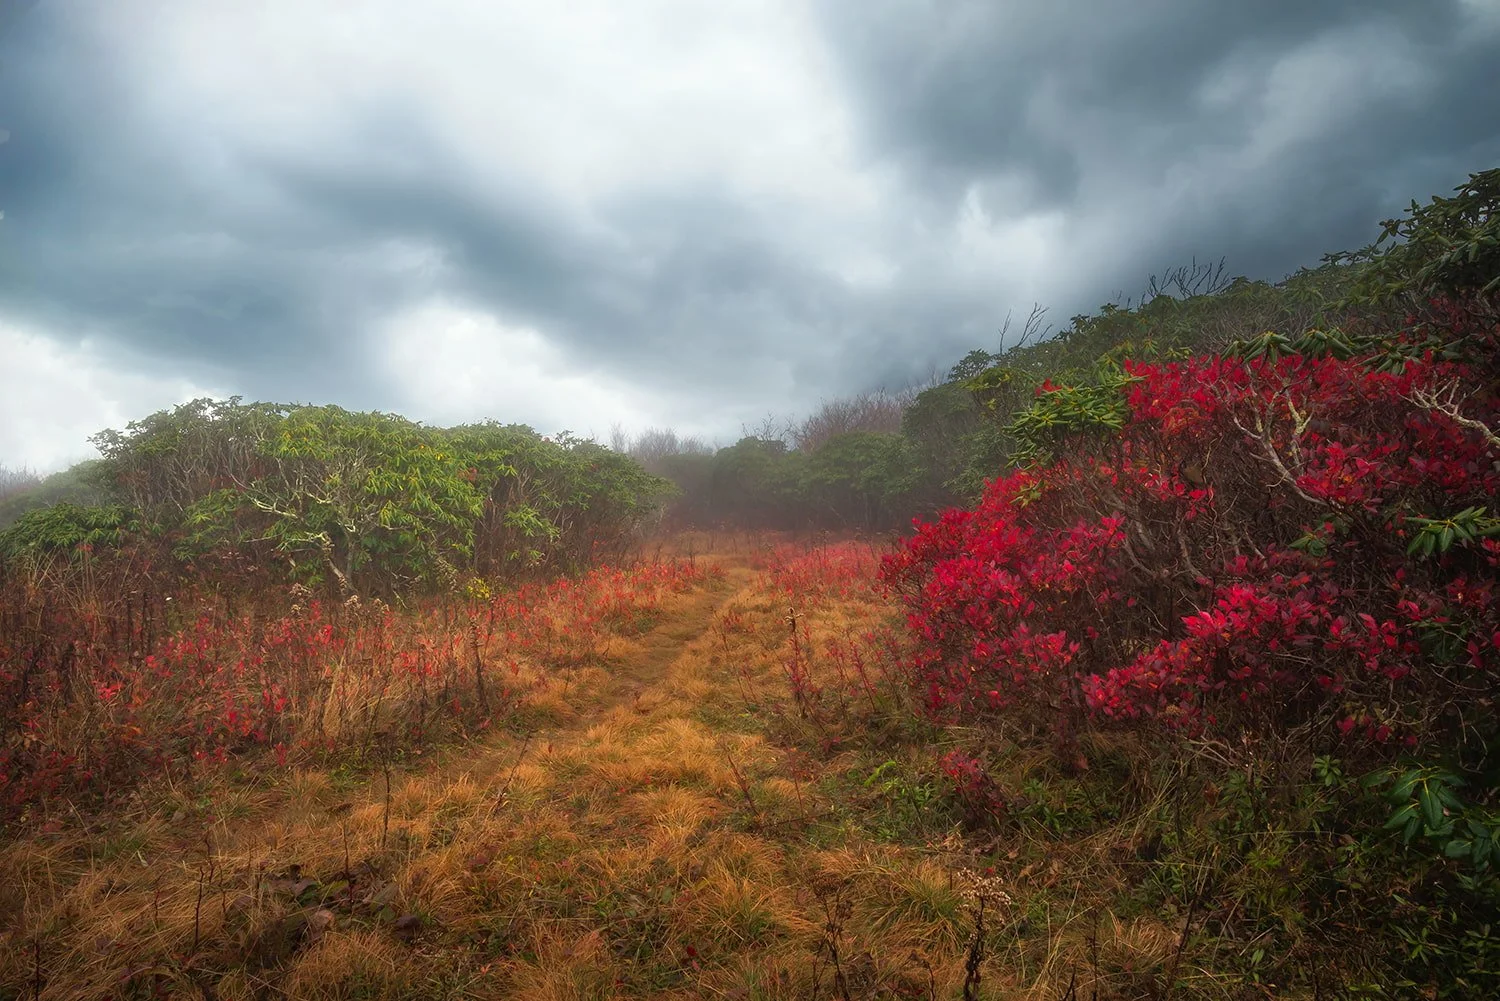
Fog and fall foliage at the summit of Craggy Gardens, North Carolina.
Craggy Gardens — Blue Ridge Parkway Milepost 364
Craggy Gardens offers some of the most dramatic high-elevation scenery along the Blue Ridge Parkway.
The broad views provide an incredible vantage point for watching fall color spread across the lower valleys. Craggy Gardens is famous for its summer rhododendron blooms, but fall creates a completely different atmosphere.
As the leaves begin to drop, the gnarled rhododendron and mountain laurel branches take center stage. They lean over the paths like crooked archways, creating a scene that can feel almost like a Gothic fairy tale. Heavy mountain fog is also common here. When fog rolls through the trail, it wraps the landscape in a quiet, mysterious stillness. Bursts of crimson and gold glowing through the fog can reveal a much moodier side of the Blue Ridge Parkway.
Sometimes you have to put the camera away and simply enjoy the moment. Craggy Gardens can provide a very atmospheric experience even when the conditions aren't what you originally came to photograph.
Best Time to Visit
Early-to-mid October, typically October 5–12
Best Photo Spots Nearby
Craggy Pinnacle — about 2 minutes
Graybeard Mountain Overlook — about 5 minutes
Glassmine Falls Overlook — about 10 minutes
Lane Pinnacle Overlook — about 15 minutes
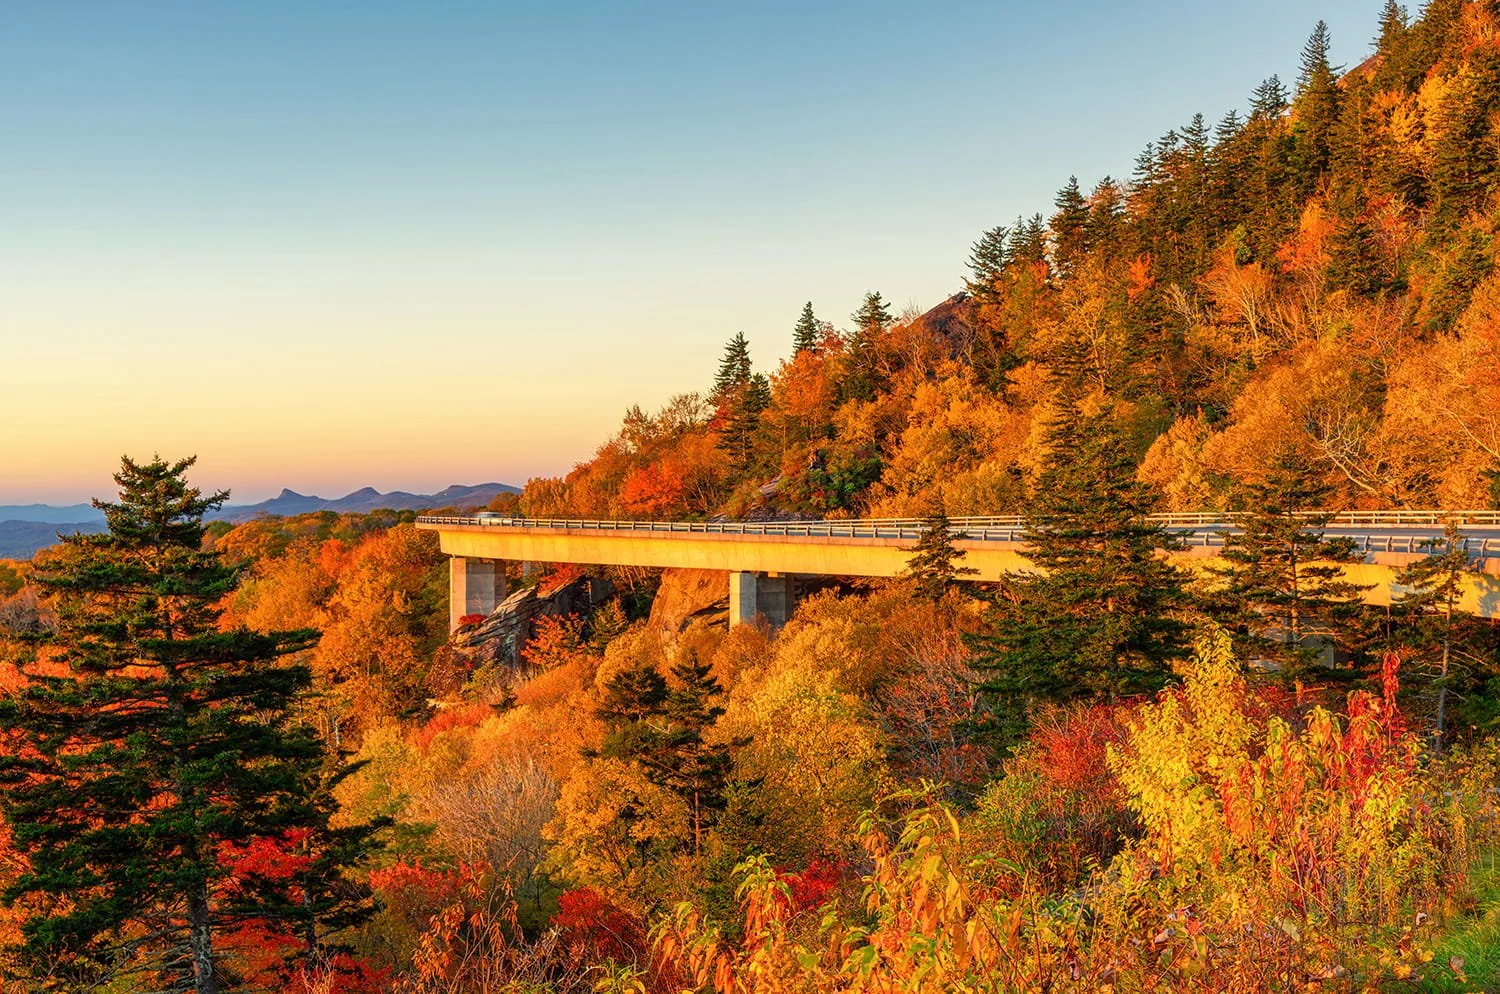
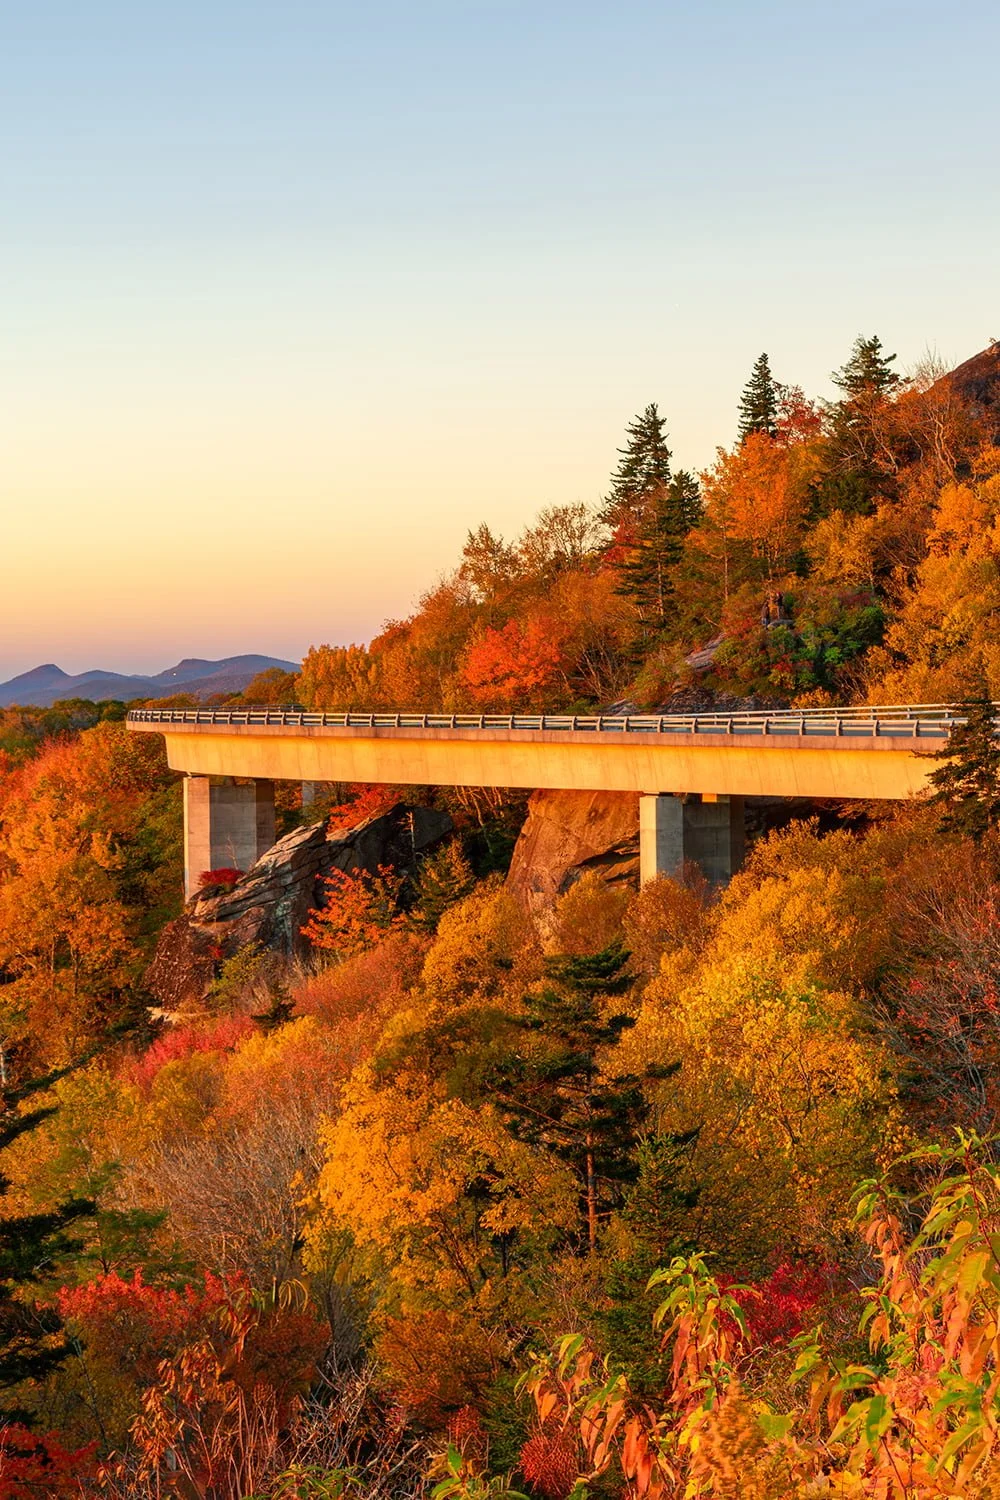
The sweeping engineering marvel of the Linn Cove Viaduct stretches across the colorful slopes of Grandfather Mountain.
Nikon Z8 + Nikon Z 24-120mm f/4 S @ 39mm, ISO 125, 1/5 sec, f/11
Linn Cove Viaduct
The Linn Cove Viaduct is one of the most recognizable engineering features on the Blue Ridge Parkway.
Completed in 1983 at a cost of nearly $10 million, the viaduct stretches 1,243 feet and follows the contours of Grandfather Mountain. Designed to minimize its impact on the surrounding landscape, it has become one of the Parkway's most iconic landmarks.
The best-known photographs are found near the north end of the viaduct. The most iconic composition is an elevated view looking down over the S-curve. A boulder on the upslope side of the road provides this elevated perspective.
However, I strongly recommend extreme caution here.
The boulder is a very small, uneven perch with no flat surface, and the climb can be hazardous. Vegetation growth can also force photographers farther out onto the rock. This viewpoint isn’t for everyone. If you have mobility issues, a fear of heights, aren’t exceptionally sure-footed, or the rock is damp, skip the climb. No photograph is worth a serious fall.
On one visit during spectacular fall color, three people were already sitting at the top when I arrived. I quickly decided to find another photo opportunity.
There are safer alternatives.
One option is to photograph the viaduct from the other side of the road, near the area connected with Yonahlossee Overlook. Worn footpaths provide different angles and more eye-level views. You’ll also find several overlooks as you drive north toward Blowing Rock and Boone. I really like these longer-distance views because they show how beautifully the viaduct blends into the side of Grandfather Mountain.
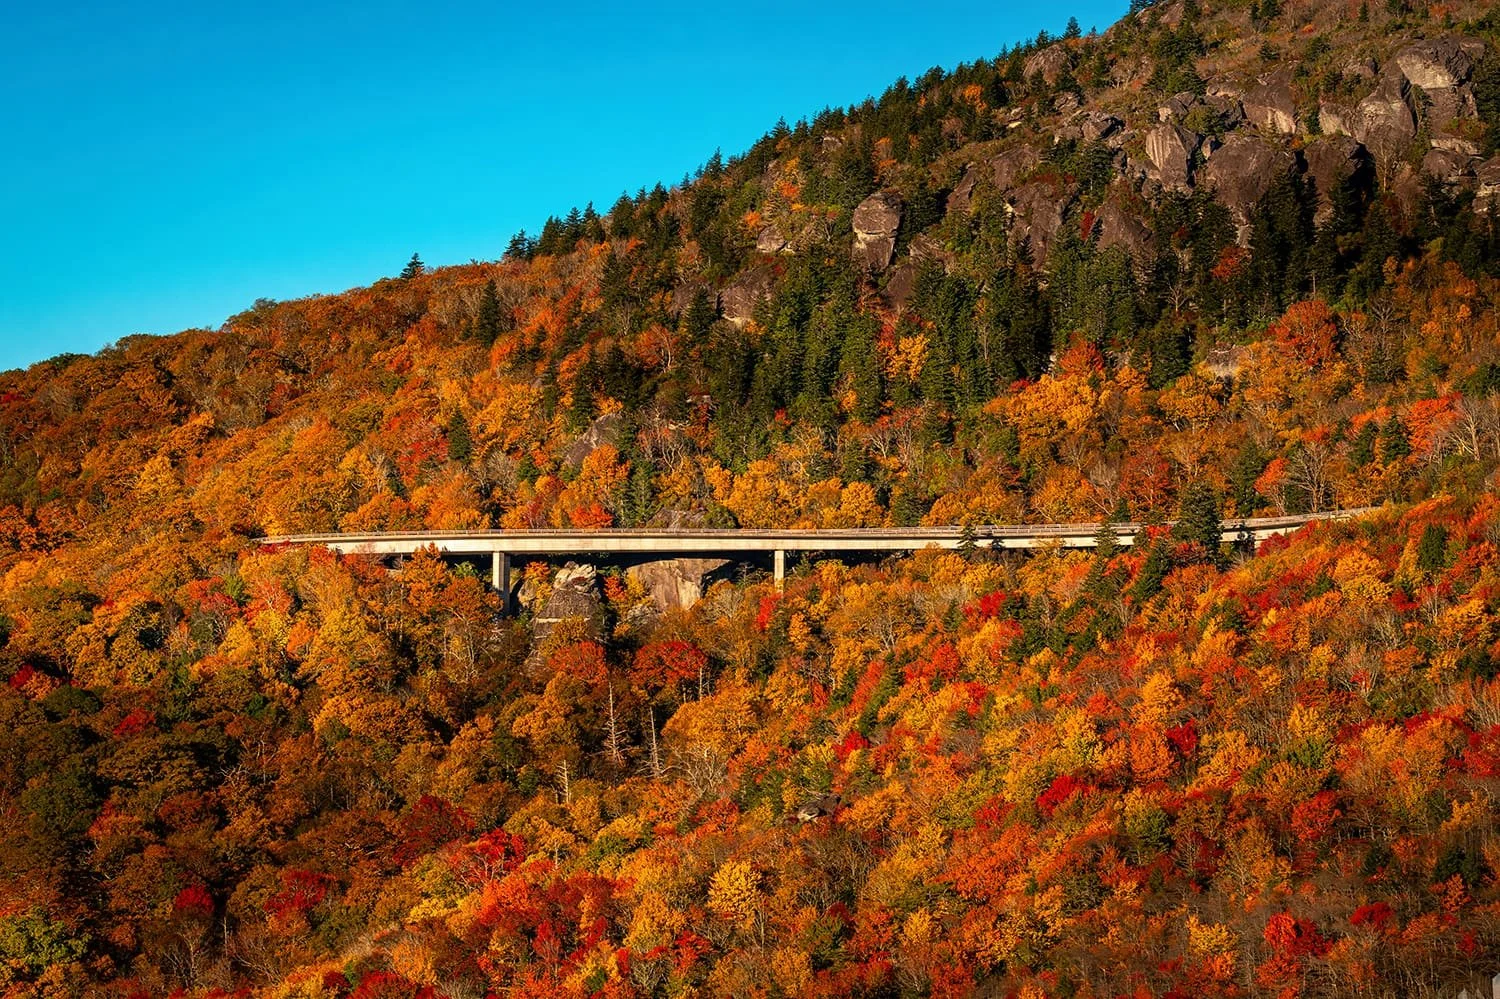
he Linn Cove Viaduct seen from afar, a silver thread woven into the brilliant autumn mountainside.
One important warning: when fall color becomes vibrant, this section of the Blue Ridge Parkway can become extremely crowded. As overlook parking fills, visitors sometimes park along the shoulder wherever they can.
Stay alert, drive slowly, and watch carefully for pedestrians crossing the road and vehicles pulling in and out of unofficial roadside parking areas.
Best Time to Visit
Mid-October, typically October 10–20
Best Photo Spots Nearby
Yonahlossee Overlook — about 1 minute
Linn Cove Viaduct overlook areas — nearby
Rough Ridge — about 5 minutes
Linville Falls — about 1 hour
Great Smoky Mountains National Park
The Great Smoky Mountains offer some of the most visually spectacular landscapes in North America, making them a paradise for photographers.
Ancient mountains, cascading waterfalls, wildlife, historic structures, low-hanging valley fog, and fall color combine to create an almost endless variety of photographic opportunities. The Blue Ridge Parkway ends near Great Smoky Mountains National Park and Cherokee, North Carolina. Cherokee serves as the southern gateway to the Smokies.
From here, photographers can explore historic sites such as Mingus Mill, waterfalls such as Mingo Falls, the elk herd around Oconaluftee, and the more remote landscapes of Cataloochee Valley.
For fall photography, two locations deserve special attention: the Oconaluftee area and Cataloochee Valley.
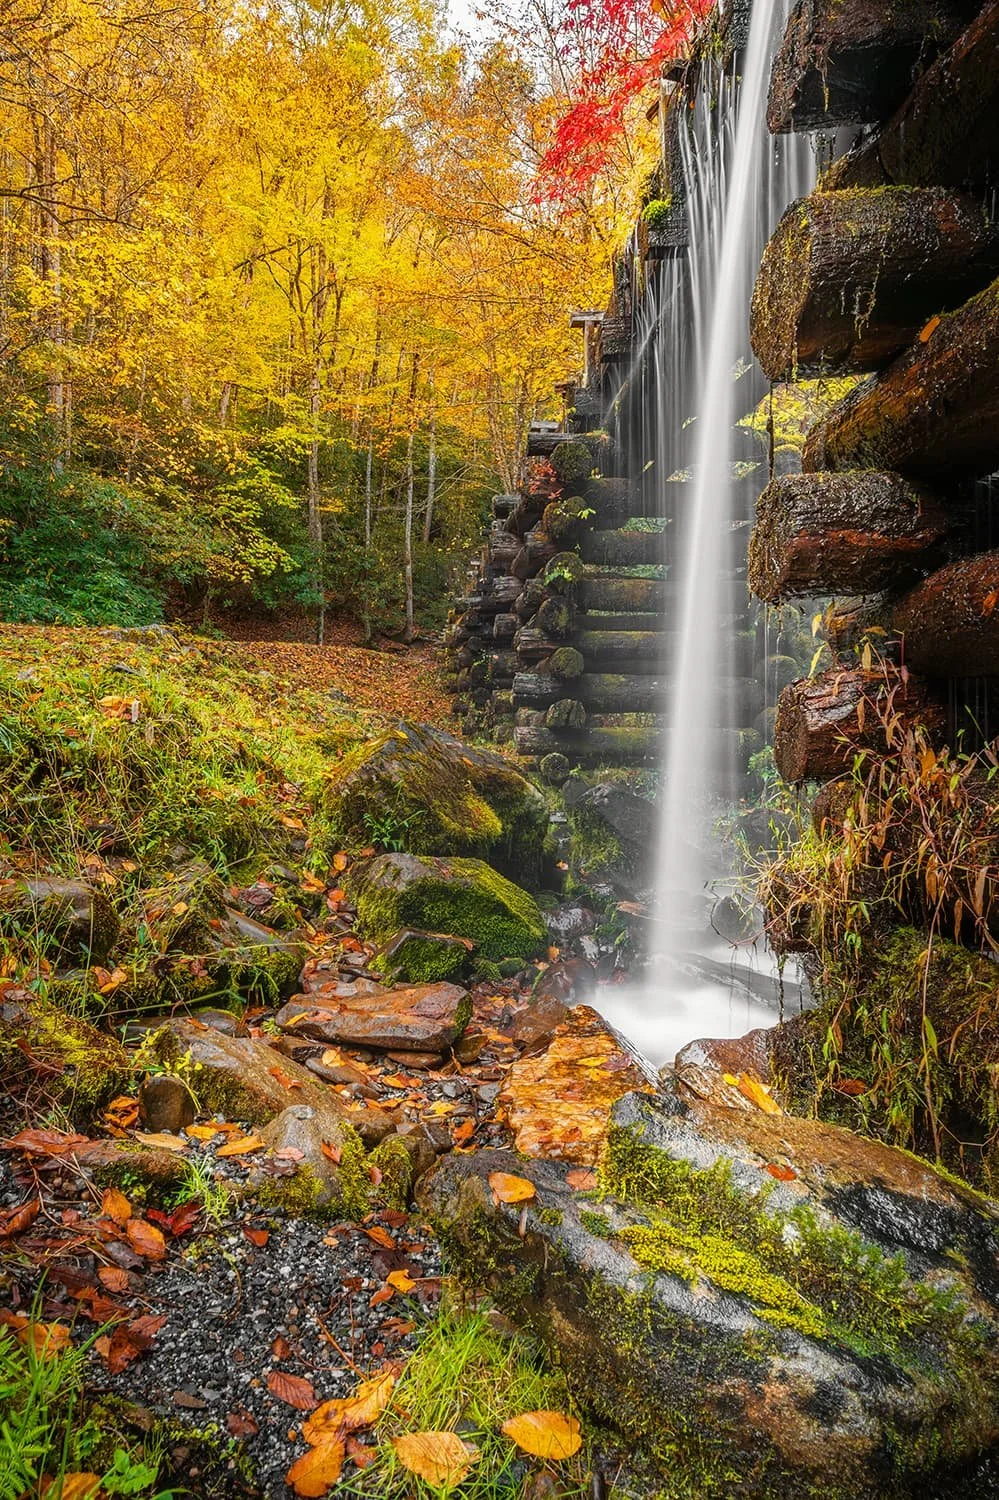
The wooden flume leading to Mingus Mill, framed by autumn’s vibrant reds and yellows.
Nikon Z8 + Nikon Z 14-30mm f/4 S @ 22mm, ISO 320, 4 sec, f/11
Mingus Mill
Mingus Mill is a historic turbine-powered gristmill located just north of the Oconaluftee Visitor Center.
Built in 1886, the mill still sits in its original location and uses water diverted from Mingus Creek to power its machinery. This is one of those locations that is exceptionally photogenic. When the stars line up and you catch Mingus Mill surrounded by peak fall color, the images can be magical.
Early morning visits are especially rewarding. The low light, cool atmosphere, and amplified sounds of the creek make photography here less about simply capturing an image and more about capturing a feeling. The mill sits in a relatively open area with enough room to comfortably work with a tripod and experiment with different compositions.
One of my favorite compositions features the elevated wooden flume in the foreground with the mill in the background. The flume creates a powerful leading line toward the mill, making this an excellent location for long exposures.
Mingus Mill also pairs naturally with the nearby Oconaluftee Visitor Center. The two locations are close enough that you can move easily from a rustic historic structure to expansive valley landscapes and elk photography.
Check current NPS conditions before visiting, as the mill periodically closes for preservation work.
Best Time to Visit
Mid-to-late October, typically October 25–31
Best Photo Spots Nearby
Oconaluftee Visitor Center — about 5 minutes
Oconaluftee River Trail — about 5 minutes
Mingo Falls — about 20 minutes
Soco Falls — about 30 minutes
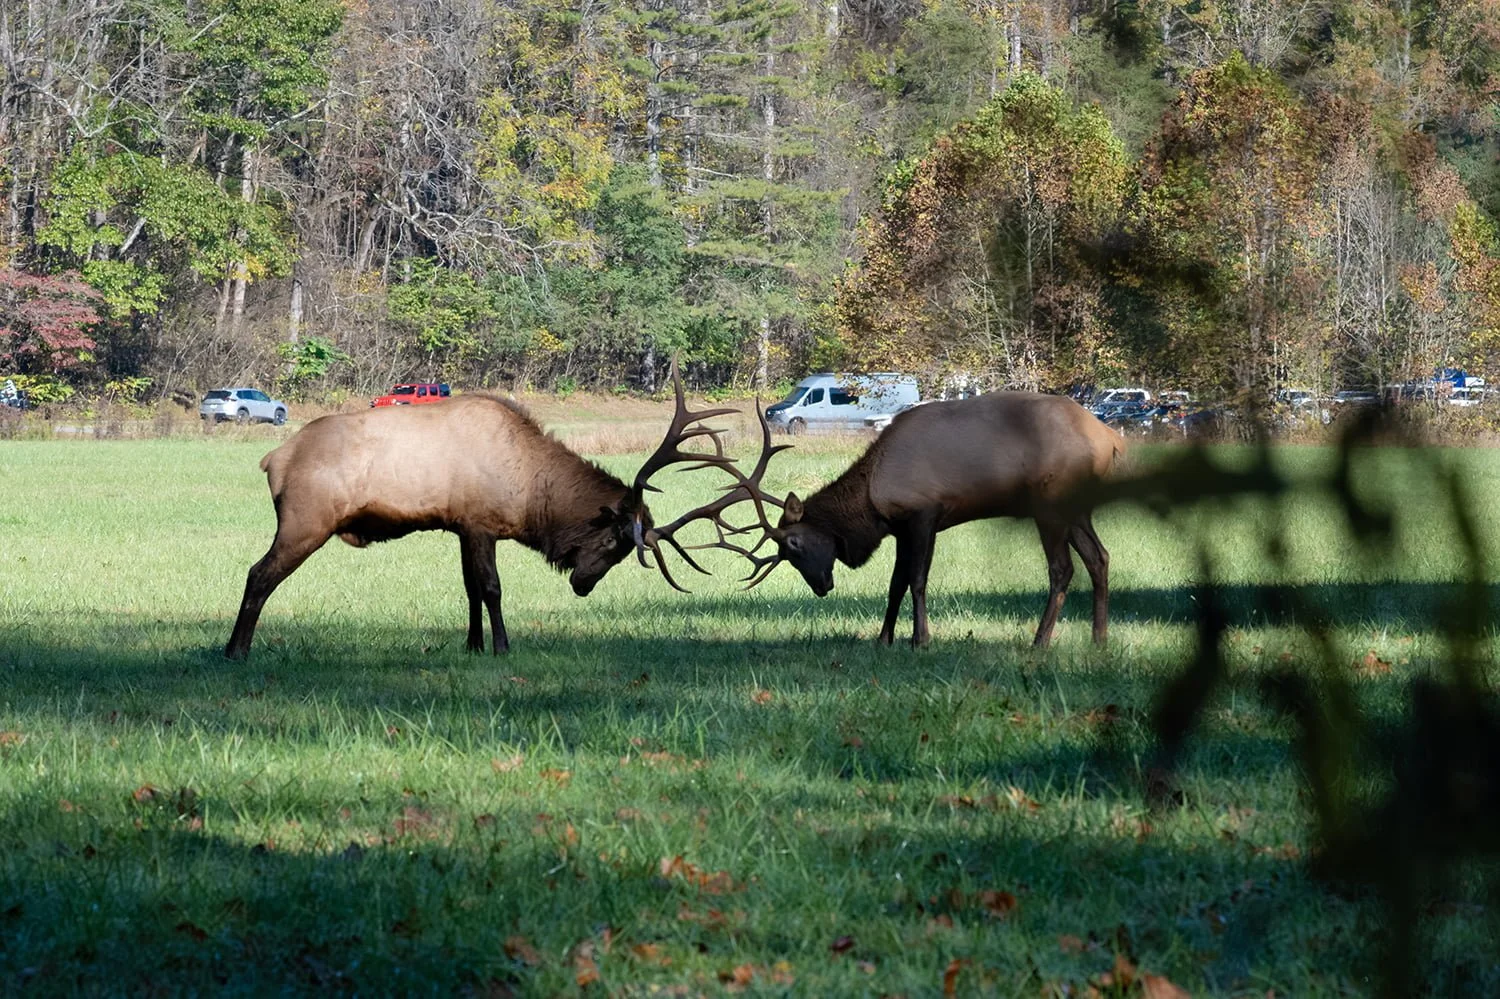
Nature's raw power on display as bull elk battle in the field next to the Oconaluftee Visitor Center.
Nikon Z8 + Nikon Z 100-400mm f/4.5-5.6 VR S @ 130mm, ISO 2000, 1/2500 sec, f/8
Oconaluftee Visitor Center and Elk
The Oconaluftee Visitor Center is the southern gateway to Great Smoky Mountains National Park.
The visitor center offers maps, ranger assistance, historical exhibits, a bookstore, and restrooms. The adjacent Mountain Farm Museum contains historic structures that provide a glimpse into 19th-century mountain life. But for many photographers, the main attraction is the elk.
The Oconaluftee area is home to one of the park's two primary elk herds. Early morning and late afternoon are generally the best times to look for active elk. Fall adds another dimension because it overlaps with the annual elk rut. From early September into late October, bulls bugle, compete for access to cows, and spar with rival bulls.
Hearing a bull elk bugle echo through a mountain valley is one of those experiences that stays with you. But remember: these are wild animals. During the rut, bulls can be unpredictable and aggressive.
The National Park Service prohibits intentionally approaching elk within 50 yards (150 feet), and the fields around Oconaluftee and Cataloochee are closed to visitors during the rut. That creates a significant photography challenge.
To photograph elk from a safe distance, a super-telephoto lens is extremely useful. A 100–400mm, 180–600mm, 200–600mm, or 150–600mm zoom can provide tremendous flexibility. Prime lenses offer advantages in low light, but zooms make it much easier to adjust your composition as the animals move.
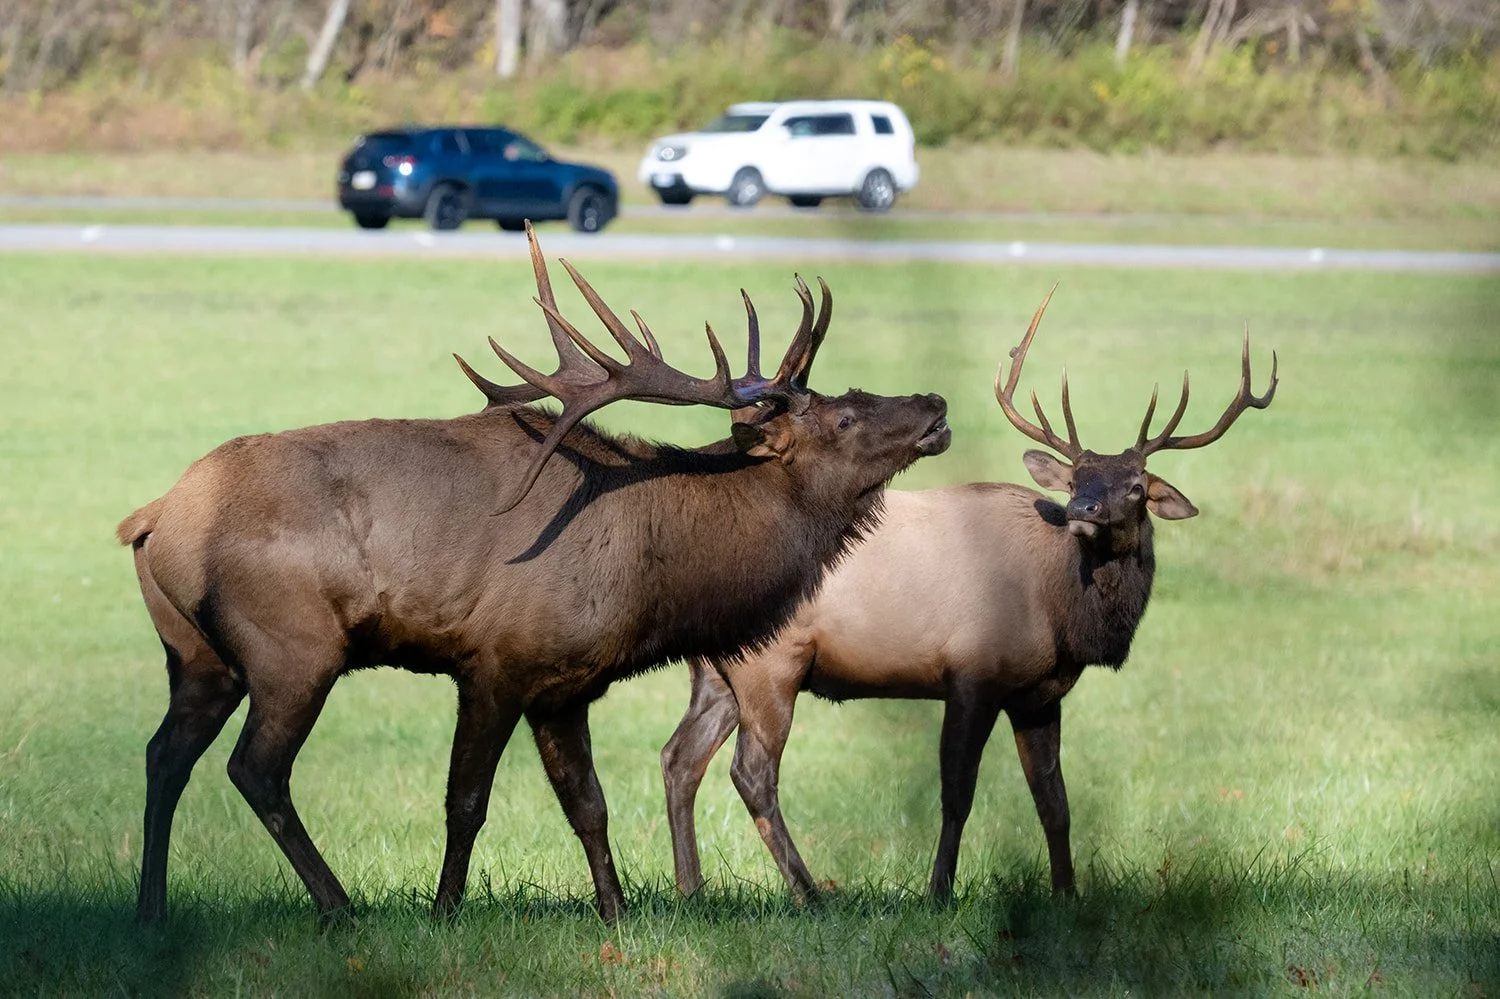
A bull elk issues a challenge during the rut, set against the backdrop of the busy Oconaluftee Valley Road.
Nikon Z8 + Nikon Z 100-400mm f/4.5-5.6 VR S @ 390mm, ISO 2000, 1/5000 sec, f/8
Another challenge is the background. Because you are photographing from established roads, viewing areas, and other permitted locations, cars, trucks, people, and other distractions can end up in the frame. A majestic bull elk can lose some of its wild, untamed presence when a bright SUV appears directly behind it.
The Oconaluftee River Trail can provide another perspective. The trail runs near the fields and through the surrounding forest, offering opportunities to photograph from the edge of the woods. It also presents a significant dynamic-range challenge. In the early morning, the surrounding mountains can be brightly illuminated while the valley floor remains in deep shadow. As the sun continues to rise, it pushes across the valley floor. This creates a difficult exposure situation, especially when the elk themselves are dark against a bright background. Or as they linger right on the edge of shadow and light.
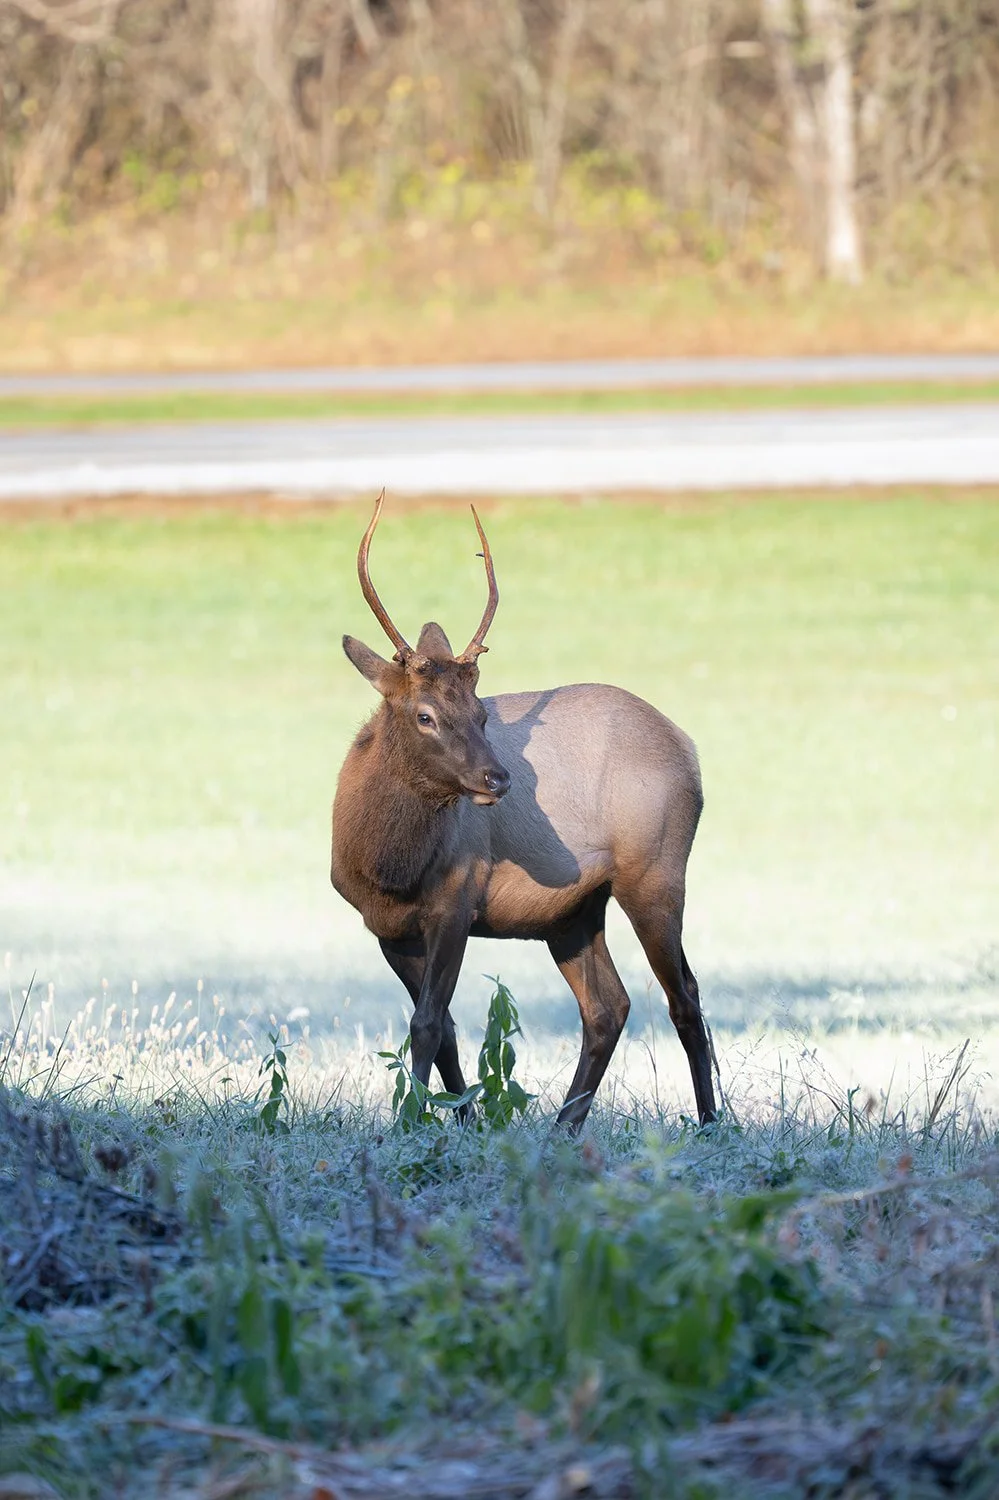
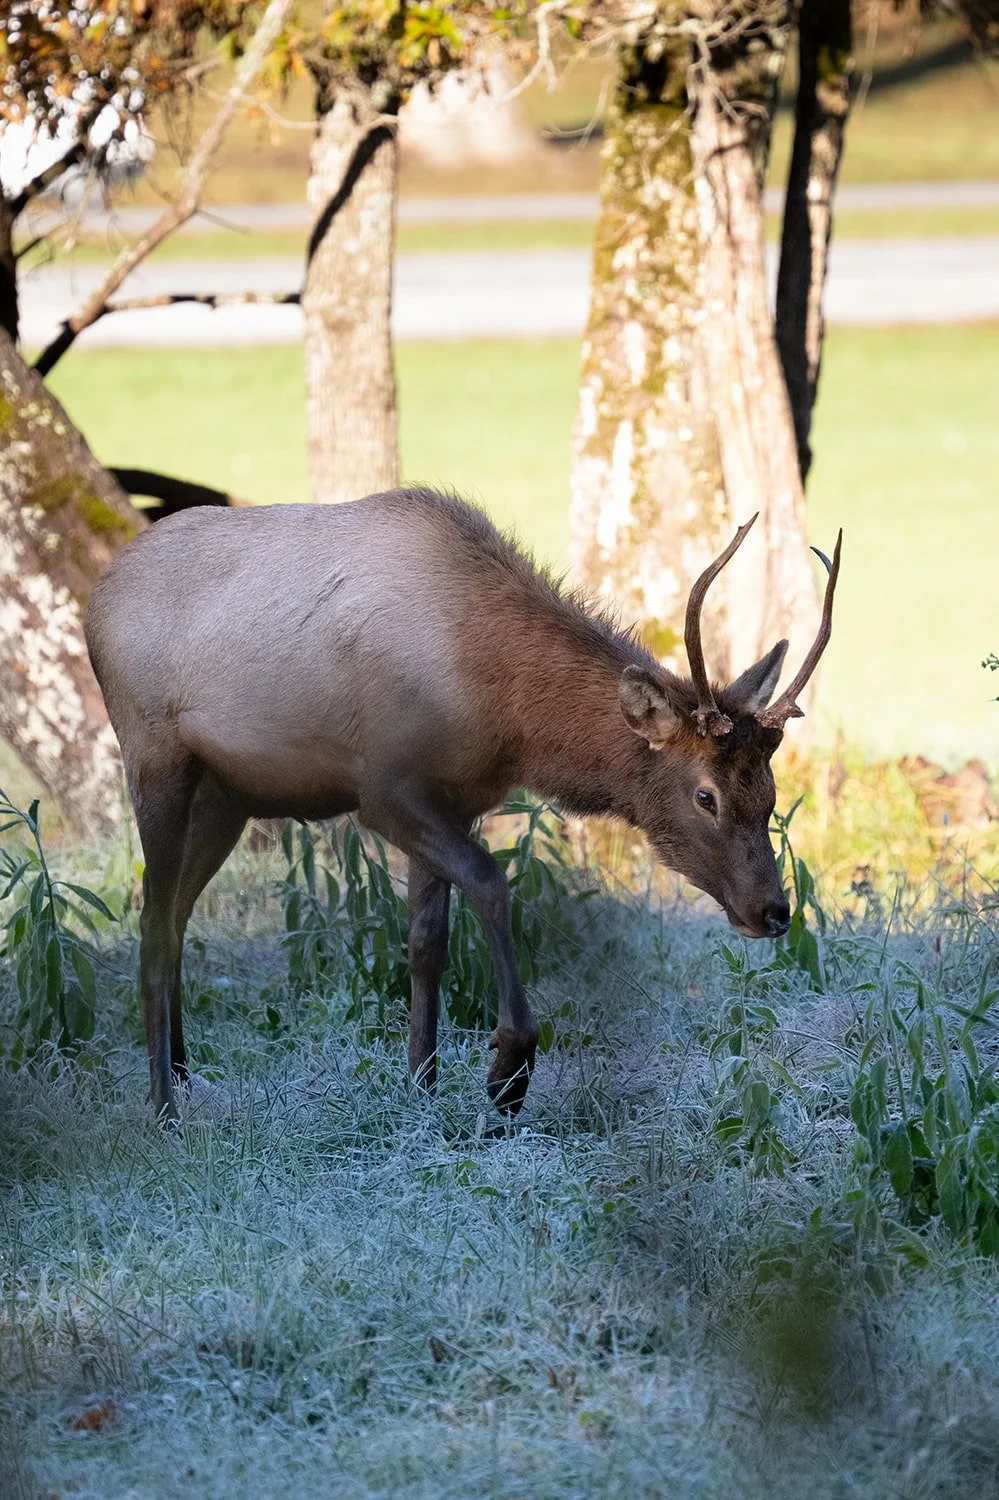
A young bull with small antlers, captured in the challenging, high-contrast light of the forest edge.
Nikon Z8 + Nikon Z 100-400mm f/4.5-5.6 VR S @ 400mm (+ DX Crop = 600mm) ISO 32000, 1/1250 sec, f/6.3
Despite the crowds, traffic, and photographic challenges, the reward can be spectacular: magnificent elk surrounded by the mountains of the Smokies.
And once you have photographed the Oconaluftee herd, a completely different experience awaits about an hour away in historic Cataloochee Valley.
Best Time to Visit
For peak fall color: Late October through early November
For the elk rut: Late September through late October
Best combination of rut and fall color: Approximately October 17–24
Best Photo Spots Nearby
Mingus Mill — about 5 minutes
Mingo Falls — about 15 minutes
Soco Falls — about 30 minutes
Tom Branch Falls — about 30 minutes
Raven Fork Overlook — about 5 minutes
Thomas Divide Overlook — about 10 minutes
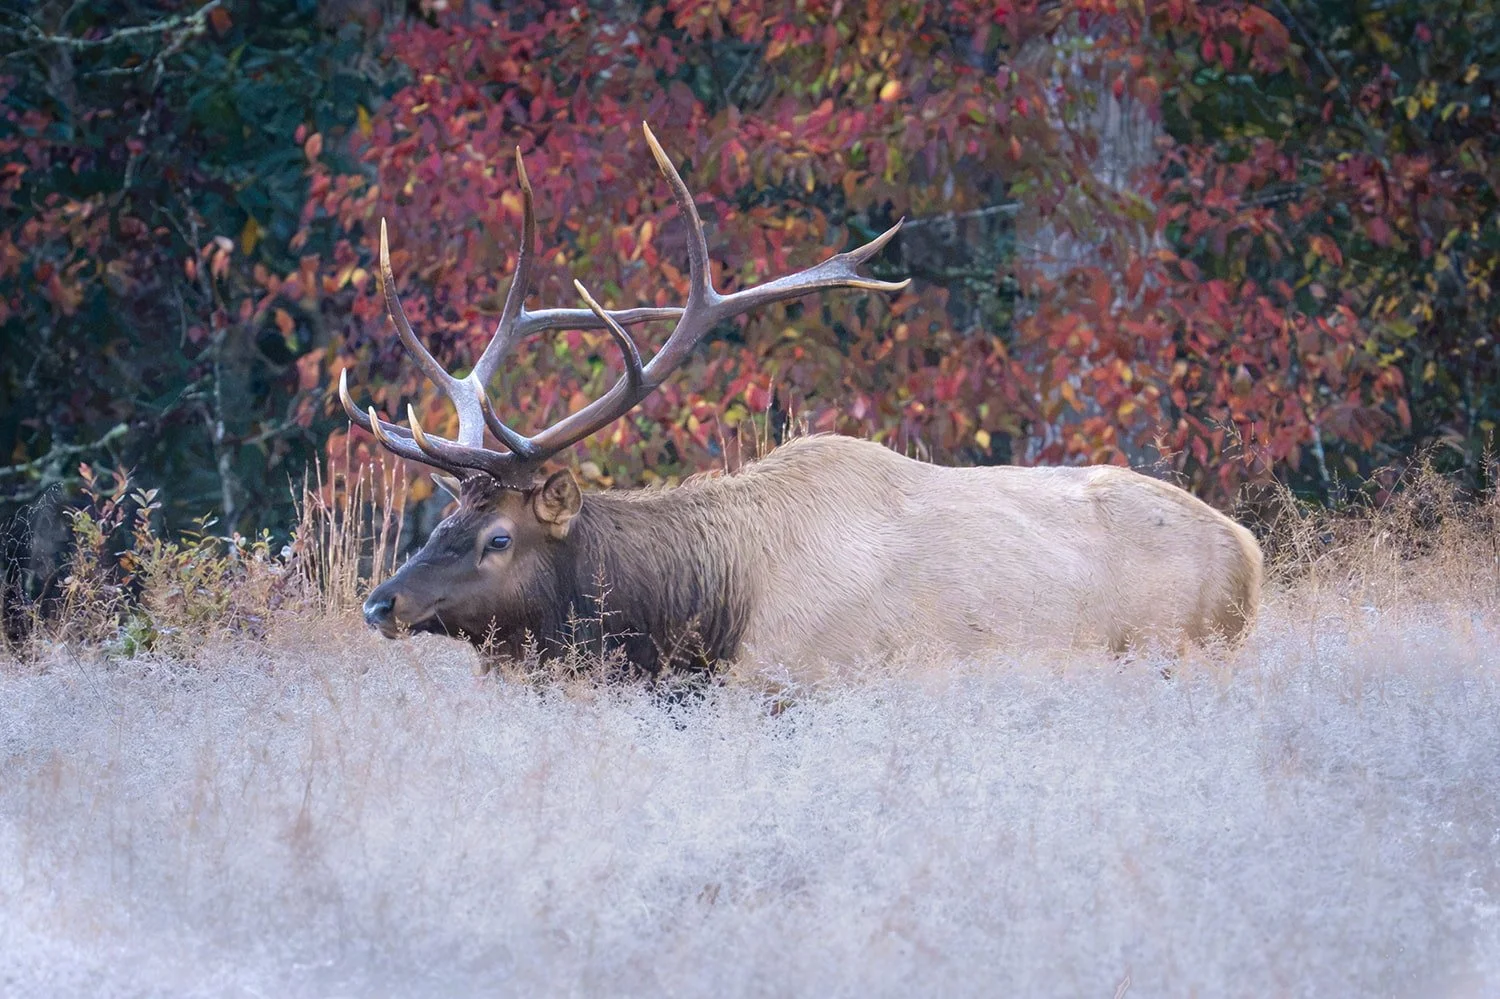
A massive bull elk standing in the Cataloochee Valley, framed by a stunning tree in peak fall color.
Nikon Z8 + Nikon Z 100-400mm f/4.5-5.6 VR S @ 400mm (+ DX Crop = 600mm), ISO 6400, 1/1000 sec, f/8
Cataloochee Valley Elk
Located in Great Smoky Mountains National Park, Cataloochee Valley is one of the best places in the region to experience free-roaming elk.
If Oconaluftee is the accessible gateway to Smoky Mountain elk, Cataloochee Valley is its rugged, remote counterpart. Getting there is part of the adventure.
The most direct route from I-40 uses Exit 20 and Cove Creek Road, following a narrow, winding road approximately 11 miles into the valley. The road includes steep drop-offs, narrow sections, and areas with no guardrails, so mountain-driving experience and patience matter. The first portion is paved, but the road eventually becomes gravel.
I drove in while it was still dark, and it was some serious white-knuckle driving. At least I couldn't see how far the road dropped away on the mountainside.
Important: There Is No Cell Service
Cataloochee Valley is remote. Cell service is unreliable, so don't depend on app-based maps once you're in the valley.
Download your maps before you leave or bring a physical map. There are also no gas stations or stores in the valley, so fill your tank and bring food and water.
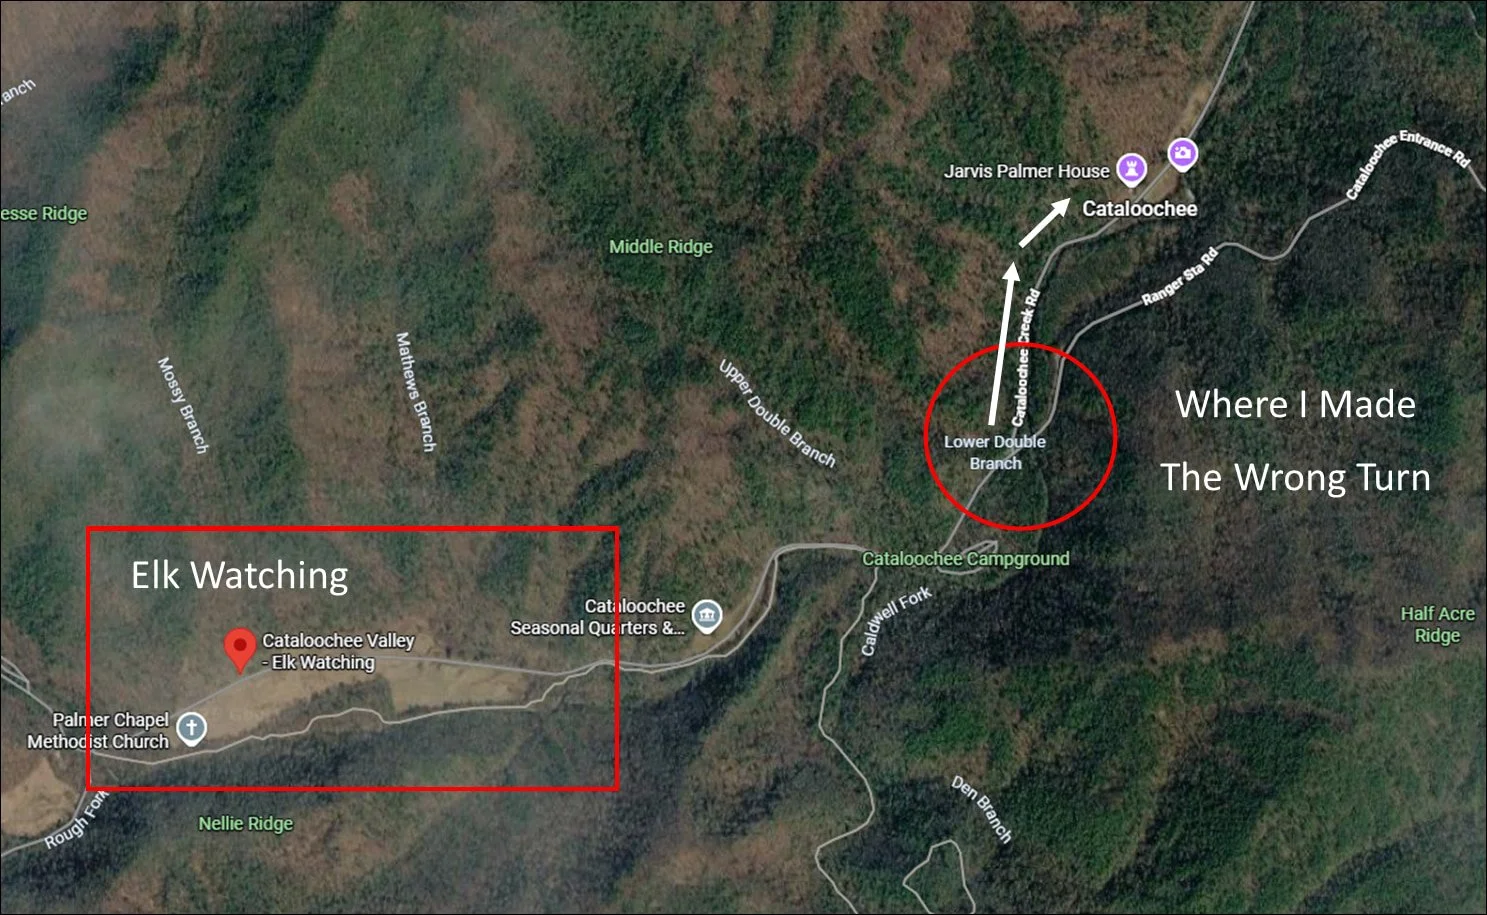
A map marking the exact spot of a wrong turn taken in the dark, leading away from the elk fields and the path to the Palmer House.
The Most Important Tip: Don't Make My Palmer House Mistake
If you're visiting Cataloochee Valley to see the elk, pay very close attention when you reach the valley floor.
Signage is sparse, and the turn is surprisingly easy to get wrong—especially when arriving before sunrise. The road to the right, at the Lower Double Branch intersection, leads onto Cataloochee Creek Road and looks like the natural way into the valley. It's a flat gravel road lined with trees, and in the dark it feels like the obvious choice.
If you stay on the main road, you'll soon see a kiosk with parking and maps on the left, which is the correct way to the elk fields. I made the right turn, which turned out to be the wrong turn! Eventually, I reached the Palmer House. Fields just beyond it on both sides of the road made it tempting to keep going. I eventually reached the campground, crossed a narrow wooden bridge, and realized I was completely off track.
With no cell service, I lost about 30 minutes of the best morning light.
Here's the rule I wish someone had given me:
When you reach the valley floor, stay left. Do not turn right at the Lower Double Branch intersection onto Cataloochee Creek Road. If you reach the Palmer House while looking for the main elk-viewing fields, turn around. The main fields are in the opposite direction.
That one piece of information could save you a frustrating 30 minutes—and potentially the best light of the morning.
Photographing the Cataloochee Elk
Once I finally reached the elk-watching fields, I found 30–40 other people looking for the same pictures. Cars lined the road, and photographers were spread along the edge of the fields.
But once I settled in with my camera, the crowd didn't matter.
As the fog lifted from the valley floor, crimson and gold appeared along the surrounding tree line. Elk began emerging from the woods, their breath visible in the cold morning air, while bulls bugled and sparred in the fields. The combination of fog, frost, fall color, and elk created one of the most atmospheric wildlife photography scenes I've experienced.
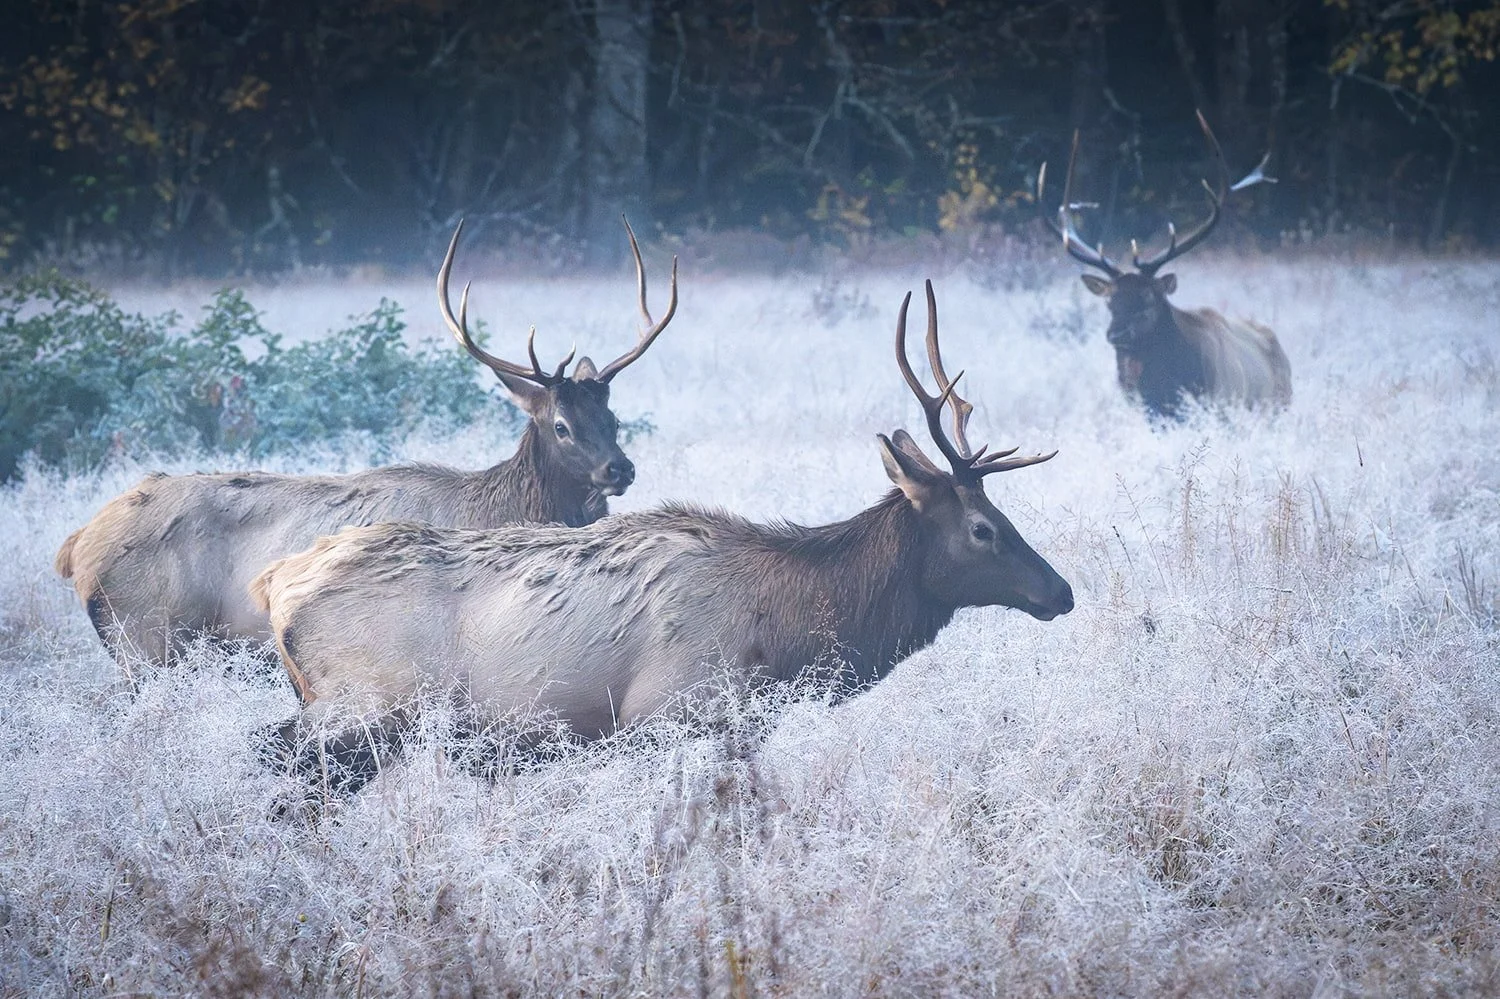
A hauntingly beautiful moment as a trio of bull elk breaks through the fog and forest edge into the open valley.
Nikon Z8 + Nikon Z 100-400mm f/4.5-5.6 VR S @ 255mm, ISO 6400, 1/1000 sec, f/6.3
The valley floor stays surprisingly dark even after sunrise, so I often shot at ISO 5000–6400 with my Nikon Z8 and Nikon Z 100–400mm f/4.5–5.6 VR S. I had the camera's record button programmed for DX crop mode. With a quick press, 400mm effectively becomes a 600mm field of view while still producing roughly 19-megapixel files.
I certainly had some lens envy watching photographers with hefty f/4 lenses on tripods and monopods, but I was happy with my smaller setup. It allowed me to reposition quickly as the action developed.
As the sun climbed over the mountains, the fog burned away, and the light became much harsher. The elk gradually moved into the woods or settled into the fields.
For me, that was the cue to pack up.
Cataloochee Valley still has plenty to explore, including historic homes, a school, a chapel, and barns scattered throughout the valley. And yes, you can even visit the Palmer House—the location of my early-morning wrong-turn fiasco.
Witnessing the Cataloochee Valley elk rut is a bucket-list experience for any wildlife photographer or wildlife lover.
Best Time to Visit
Mid-September through late October
Peak elk activity: Early October
Best combination of elk rut and fall color: Mid-to-late October
Best Photo Spots Nearby
Soco Falls — about 1 hour
Oconaluftee Visitor Center — about 1 hour, 30 minutes
Mingus Mill — about 1 hour, 30 minutes
Mingo Falls — about 1 hour, 30 minutes
Tom Branch Falls — about 1 hour, 30 minutes
My Top 6 Western North Carolina Fall Photography Tips
1. Arrive Early
Arriving early is my number-one photography secret.
If you want better photos, the most important piece of gear you own may not be your camera. It's your alarm clock. Arriving early lets you beat the crowds and take advantage of clean, magical light.
I once had Mingus Mill almost completely to myself for an hour and a half. That gave me time to work on different compositions and experiment with long exposures without feeling rushed or constantly working around other photographers. Arriving early gave me a private canvas.
If you only take one piece of advice away from this blog, let it be this:
Set your alarm clock earlier than everyone else.
2. Use a Circular Polarizing Filter
A circular polarizing filter, or CPL, is one of the best ways to elevate your autumn photography.
By reducing glare, a polarizer can reveal richer foliage colors and add contrast to landscape images. It is especially useful for waterfall photography because it can reduce distracting reflections and glare from wet rocks and leaves.
A polarizer is one of those tools that can produce an effect in the camera that is difficult to completely recreate in post-processing.
3. Use Overcast Days to Your Advantage
Cloudy weather creates soft, even light that brings out rich colors without the harsh glare of sunny days.
Overcast conditions can actually extend your shooting time because the soft, diffused light reduces harsh shadows and bright highlights. That means you can comfortably photograph for much more of the day—not just during the early morning and golden hour. Cloud cover can also help bring out the reds, oranges and yellows of Western North Carolina foliage while making waterfalls, forests and mountain scenes easier to expose correctly.
Don't automatically cancel a photography day because the forecast says cloudy.
Sometimes those are the best days.
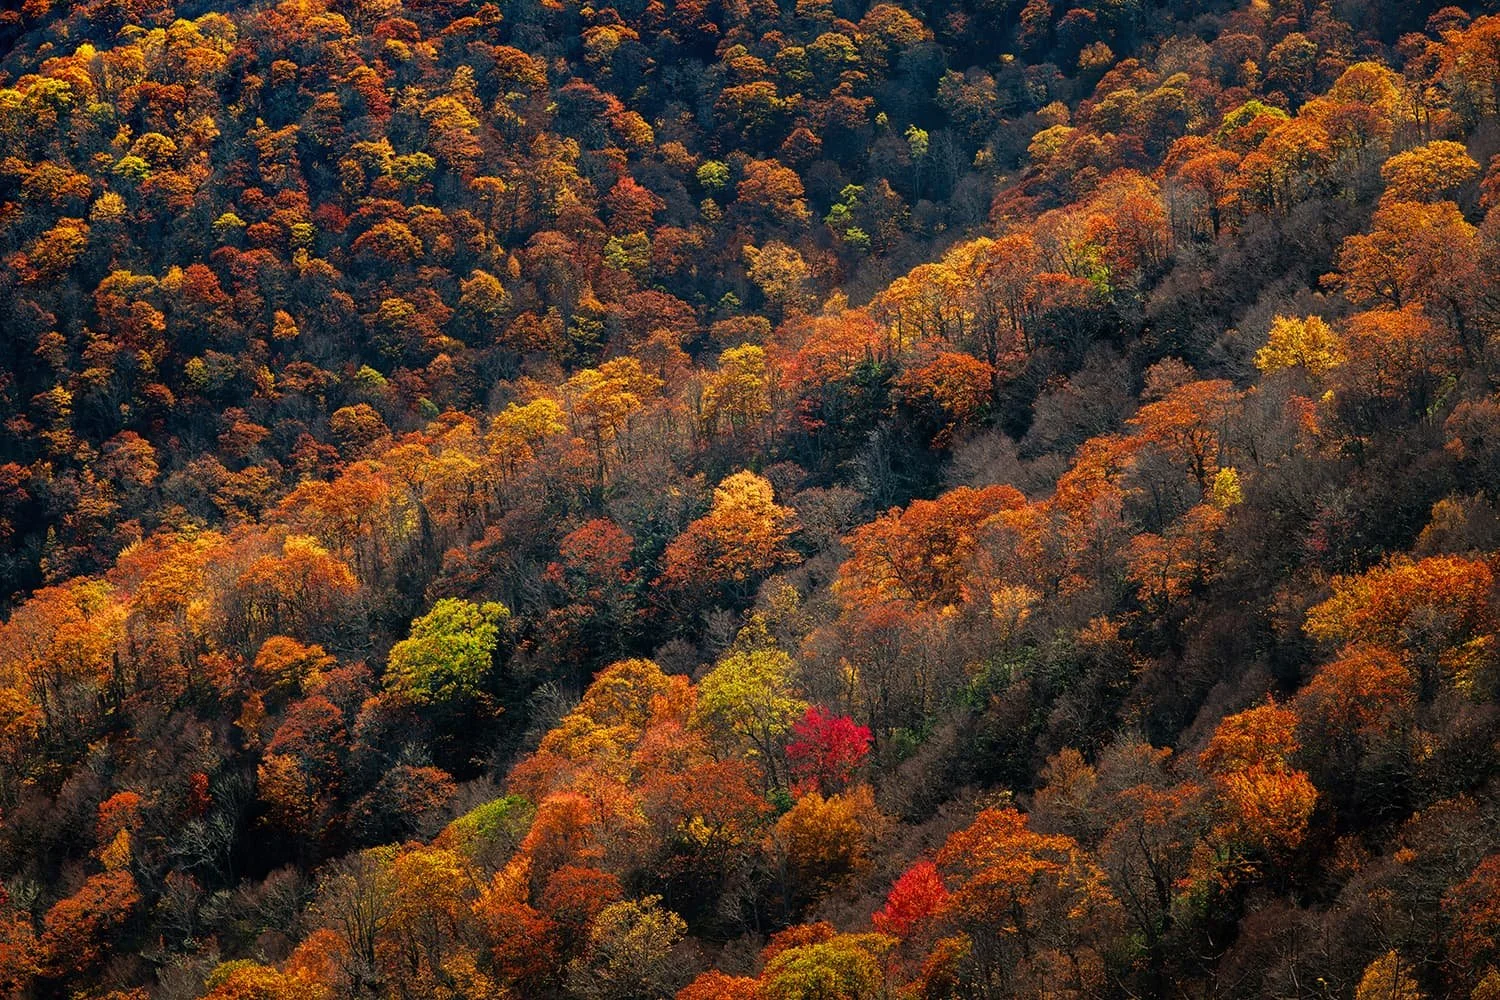
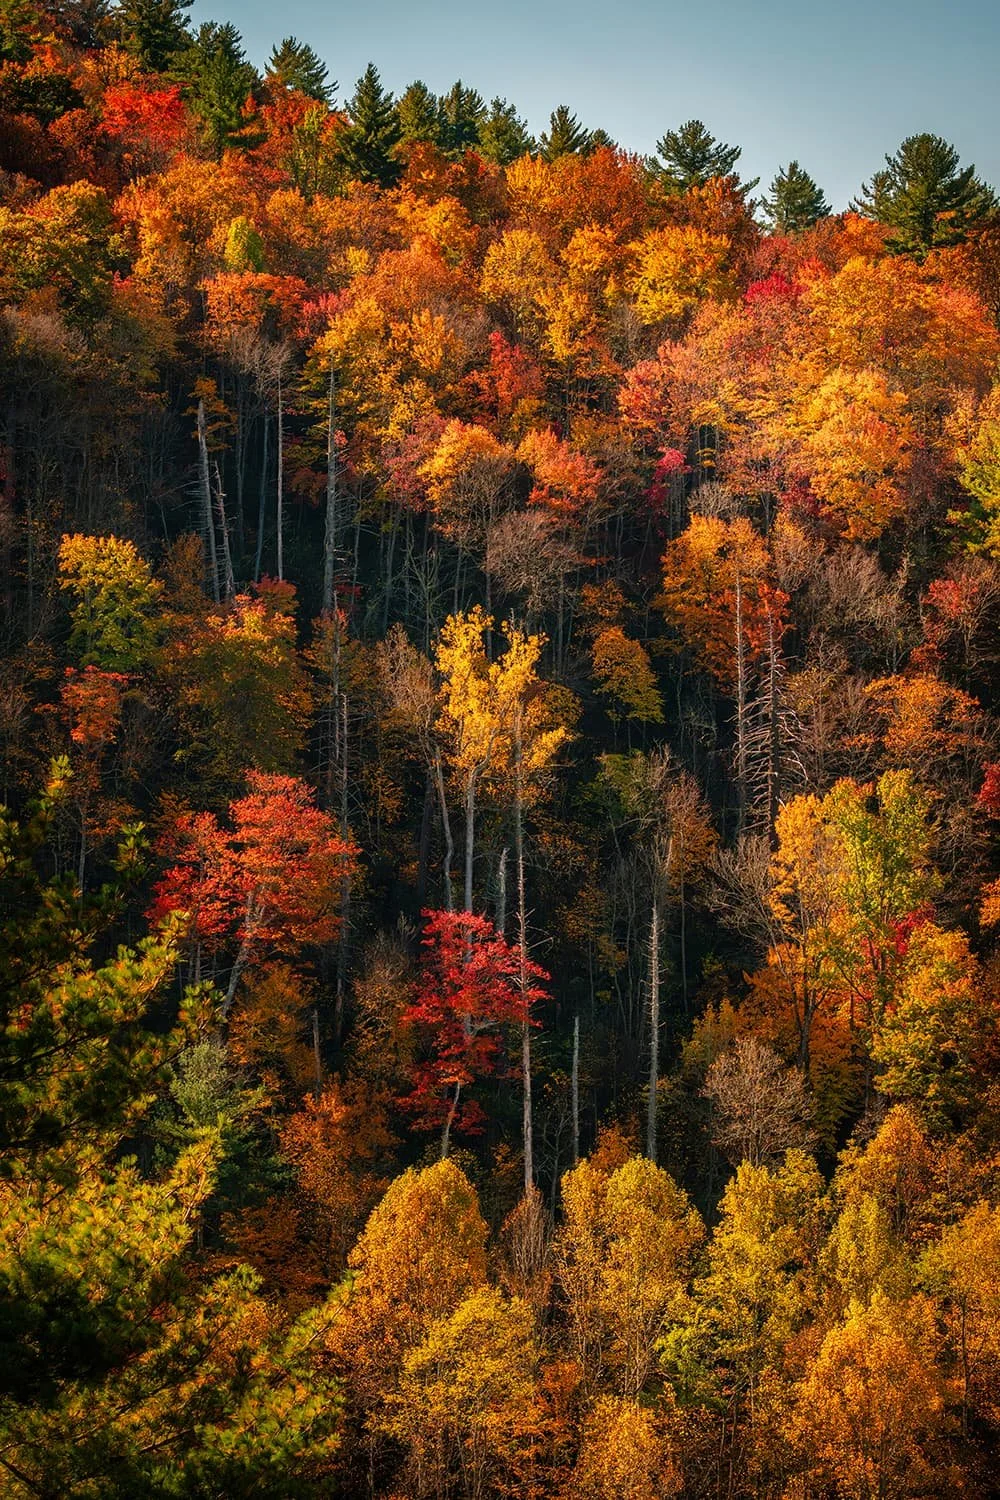
Layers of fall color along the Blue Ridge Parkway.
4. Carry Less Gear
Fall photography in Western North Carolina often means hiking, climbing, and navigating winding mountain roads.
Less gear can mean more freedom.
Instead of carrying your entire camera bag everywhere, choose one versatile lens and the essentials you will actually use. A lighter setup makes it easier to walk farther, change viewpoints, and stay focused on finding great light and compositions rather than constantly swapping gear.
Sometimes the best fall photograph is the one you can get because you weren't weighed down by everything else.
5. Stay Flexible and Follow the Color
Peak foliage doesn't happen everywhere at the same time.
Higher elevations can change before lower valleys, so be willing to adjust your plans. If the color isn't quite there at one location, keep exploring. Sometimes the best scenes are only a few miles down the road—or several hundred feet lower.
This is one reason I recommend having five to seven potential locations in your back pocket.
Don't become so committed to a particular location that you miss the peak color somewhere else.
6. Don't Forget to Put the Camera Down
It's easy to become so focused on finding the perfect composition that you miss the very moment you came to experience.
Take a few photographs. Then pause. Look around. Listen to the leaves. Feel the crisp mountain air. Take in the colors with your own eyes. The best memories aren't always the ones stored on your camera.
Sometimes the best part of a fall photography trip is simply standing there and taking it all in.
Before You Go: Check Current Conditions
Mountain weather can change quickly, and conditions in Western North Carolina can change just as quickly after a major storm.
Roads, trails, overlooks, parking areas, and entire sections of the Blue Ridge Parkway or Great Smoky Mountains National Park can close because of severe weather, flooding, rockslides, fallen trees, or other storm damage. Always check the National Park Service website for current alerts, road closures, and trail conditions before heading out. This is especially important when planning a photography trip around a specific location. A beautiful fall destination isn't much help if the road to get there is closed.
A little planning before you leave can save you a long drive, a wasted morning, and a whole lot of frustration.
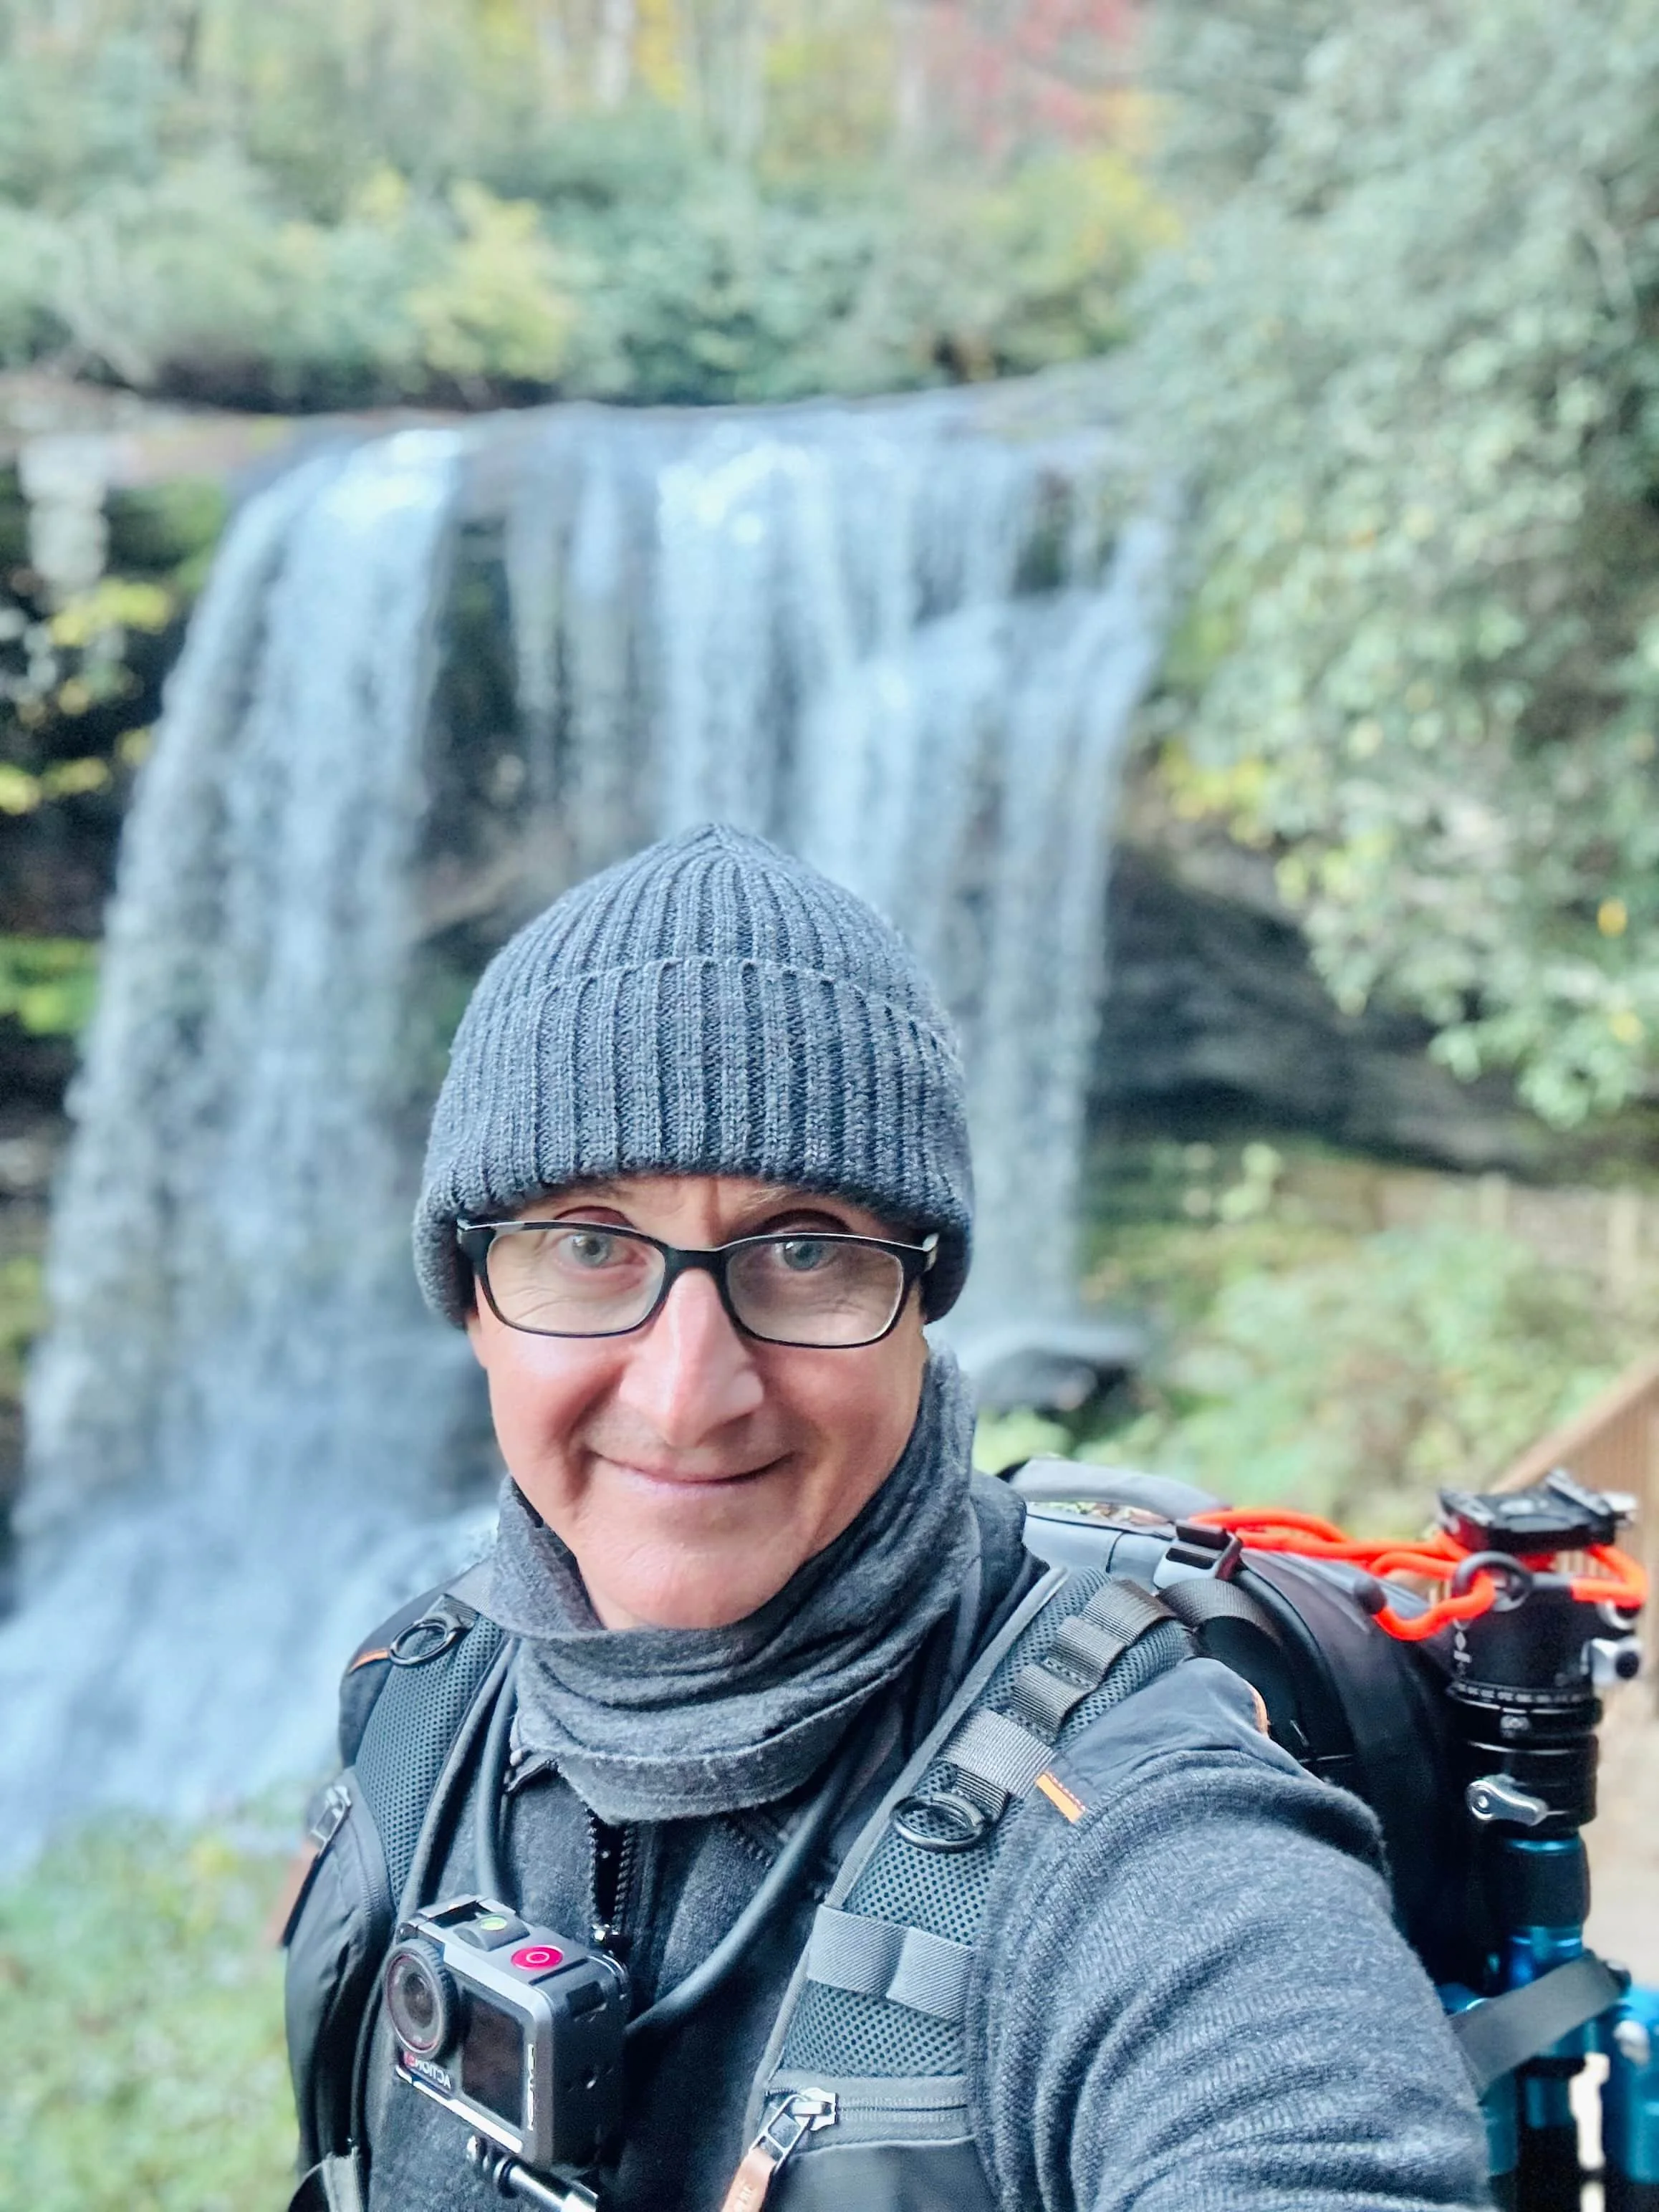
My Go-To Gear for Photographing Western North Carolina in Autumn
I never get tired of photographing Western North Carolina in the fall; here is my gear list:
• Nikon Z8 with Kirk L Bracket
• Nikon 100-400mm f/4.5-5.6 VR S
• Maven Filter Set 82mm color-coded magnetic filter set (a 77mm to 82mm step-up ring is used on my Nikon 24-120mm)
•Really Right Stuff BH-40 LR Ball Head