Looking Glass Falls
Please note: Some links on this page are affiliate links (including B&H and Adorama). This means I may earn a small commission if you purchase through those links—at no additional cost to you.
Looking Glass Falls: North Carolina’s Iconic Waterfall
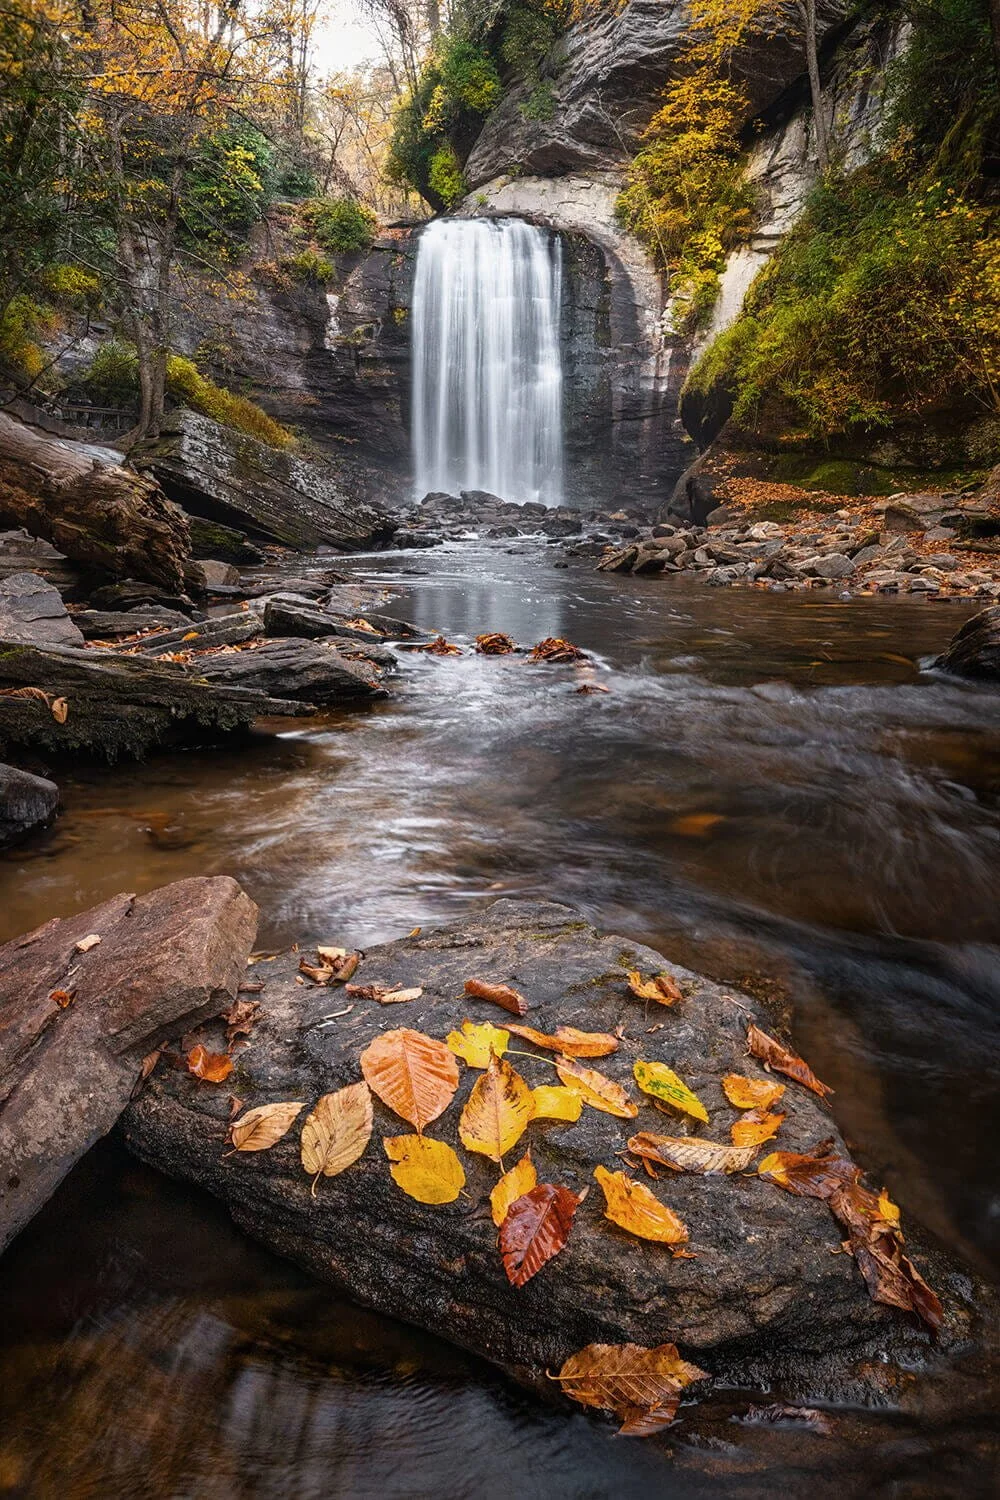
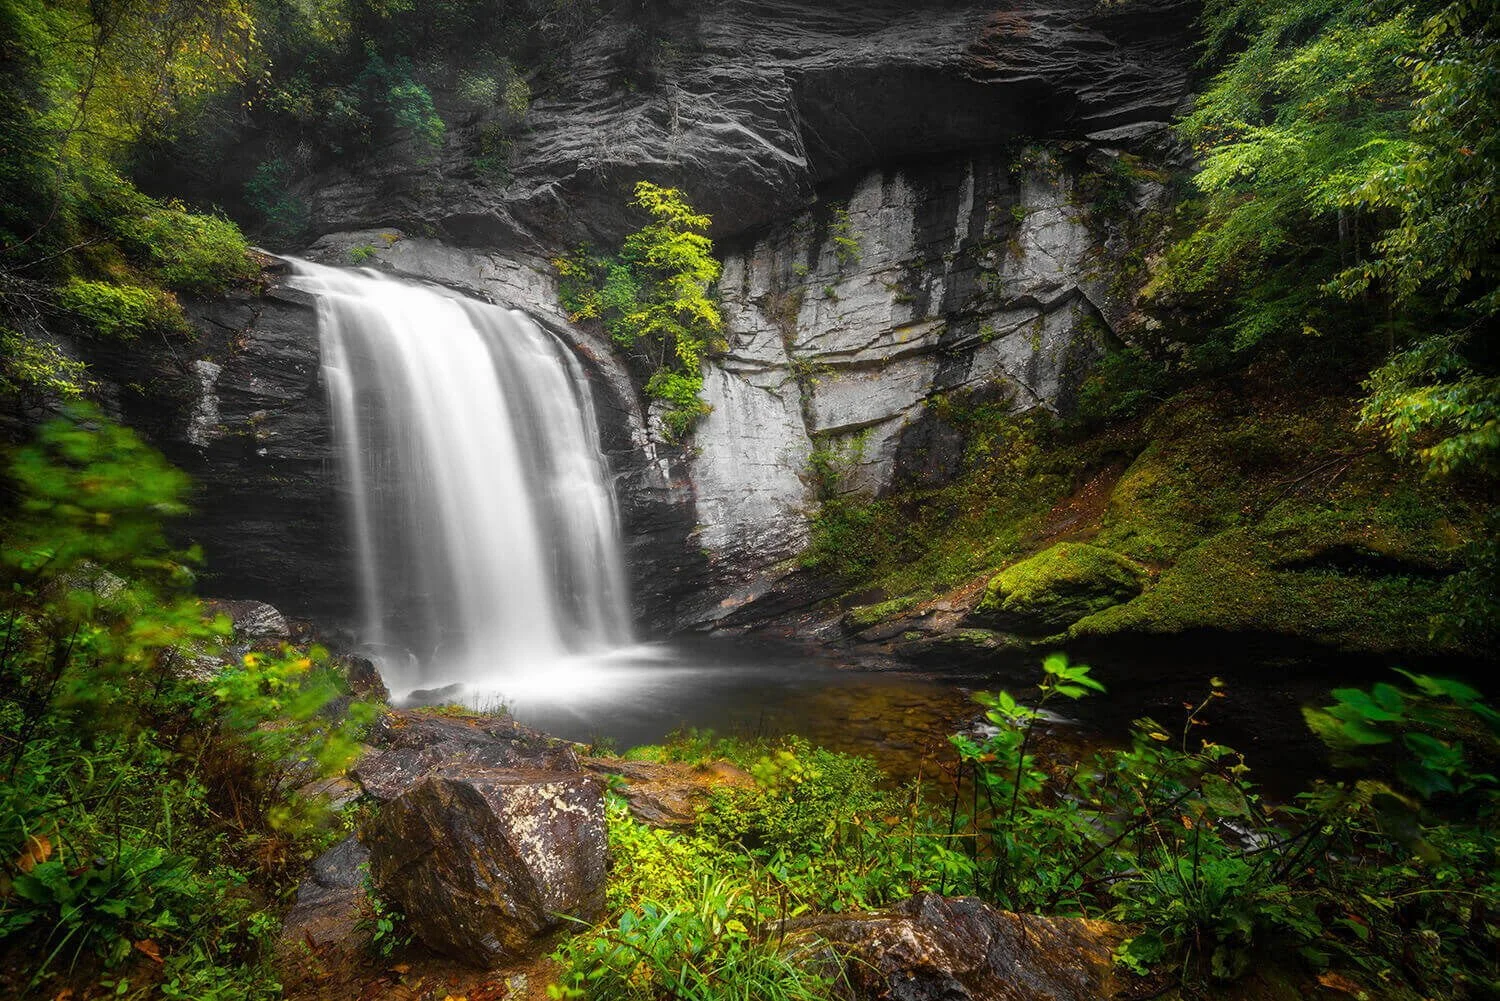
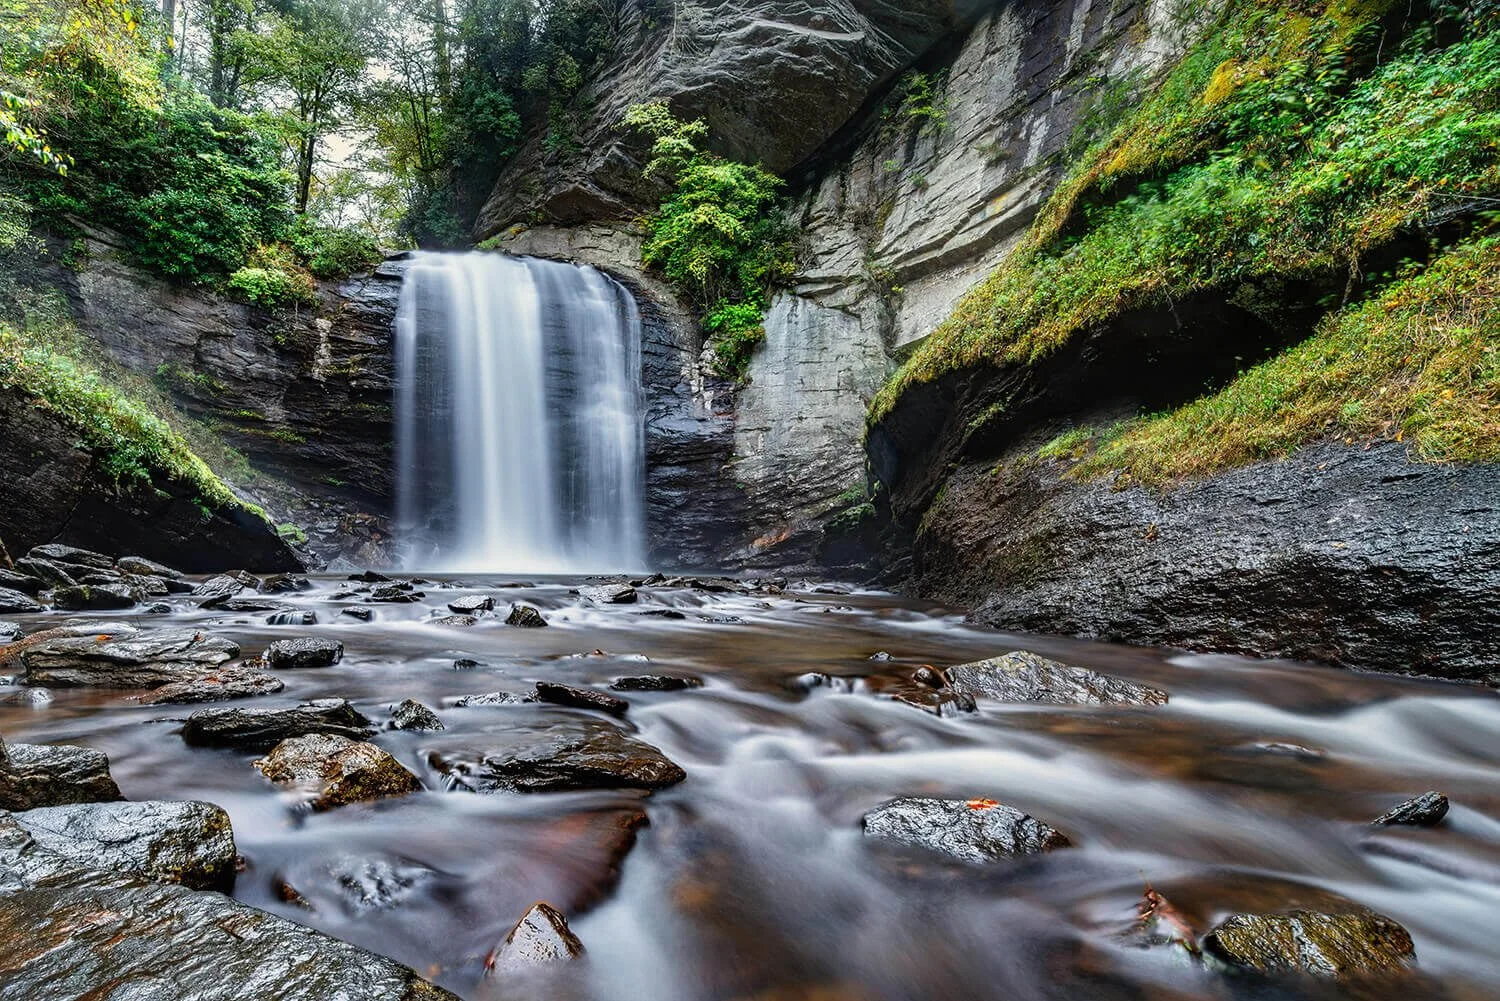
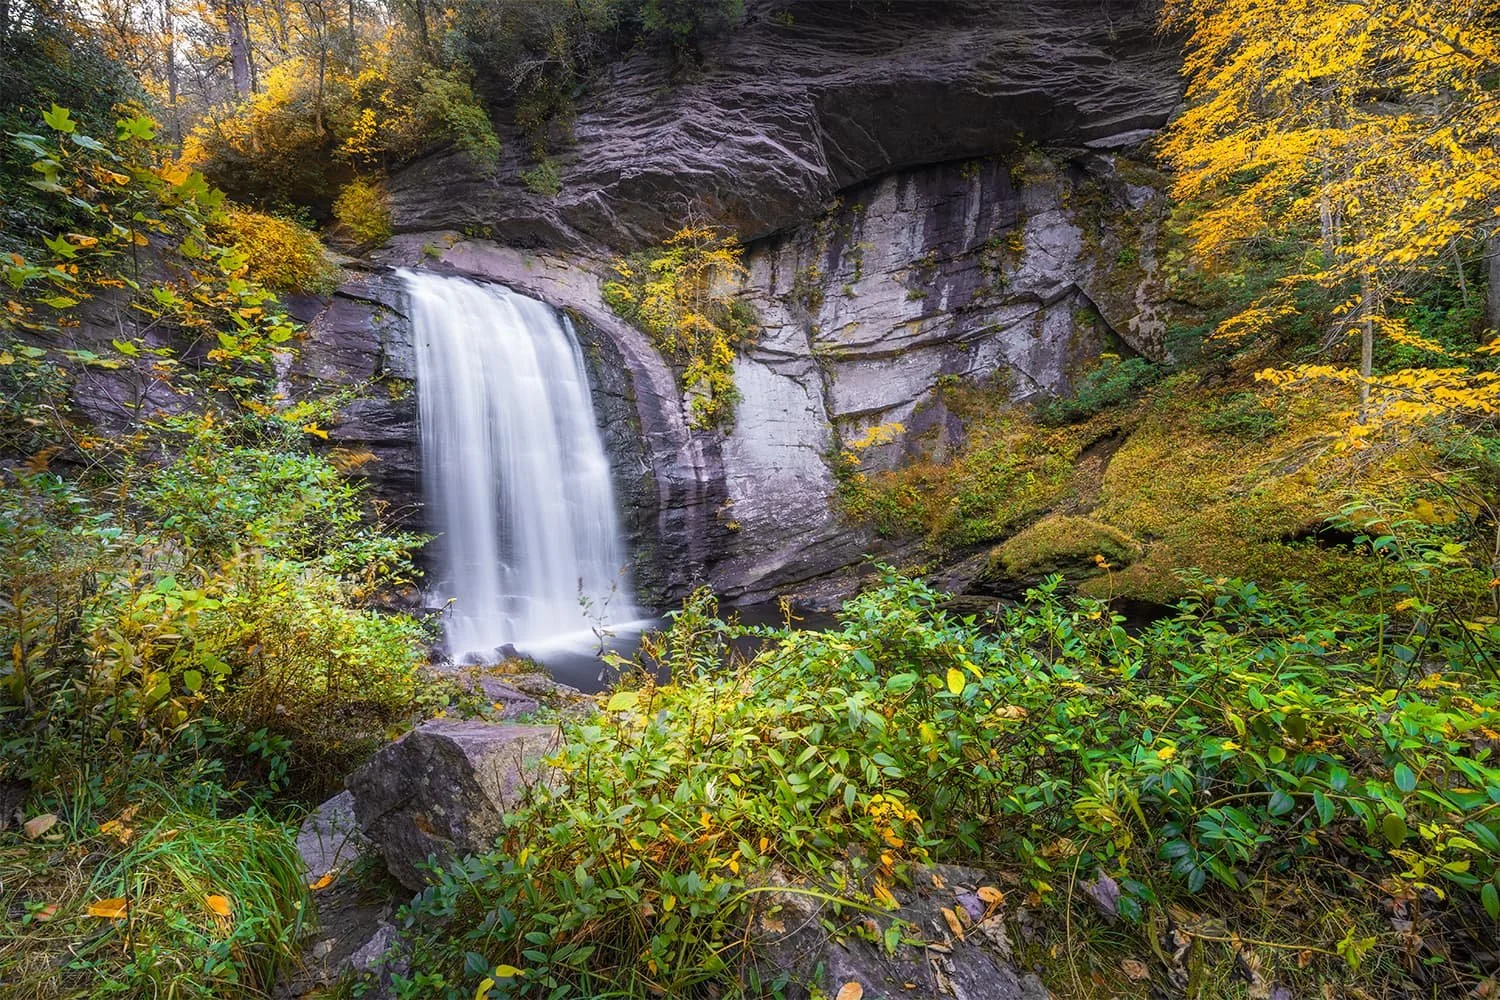
The roaring sound of water surging over a 60-foot drop, the feel of a misty spray in the air, the sight of white frothy water dissipating into the calmness of a plunge pool, the transition of wild, untamed nature into the gentle playfulness of water trickling over submerged logs and stones—this is Looking Glass Falls, one of the most iconic North Carolina waterfalls in the heart of the Pisgah National Forest.
When someone thinks of a waterfall, the image in their mind most likely resembles Looking Glass Falls. If you type "waterfall icon" into Google Images, all the results closely resemble this spot; it truly is the quintessential waterfall and one of the most visited on the Blue Ridge Parkway.
The most photographed waterfall in North Carolina is also one of the most accessible.
How to Get to Looking Glass Falls
Located in the Pisgah National Forest, it is a short hop off the Blue Ridge Parkway via US Highway 276 South or an easy drive on US Highway 276 North from Brevard, NC. It is the keystone attraction of the Forest Heritage National Scenic Byway, a 65-mile trek through the Pisgah National Forest and one of the region's best scenic drives.
Accessibility & Viewing Areas
Roadside parking and an observation deck make it ideal for people with mobility challenges or anyone looking for an easy, family-friendly waterfall stop. A set of concrete steps leads down to another viewing area with a charming view about halfway down.
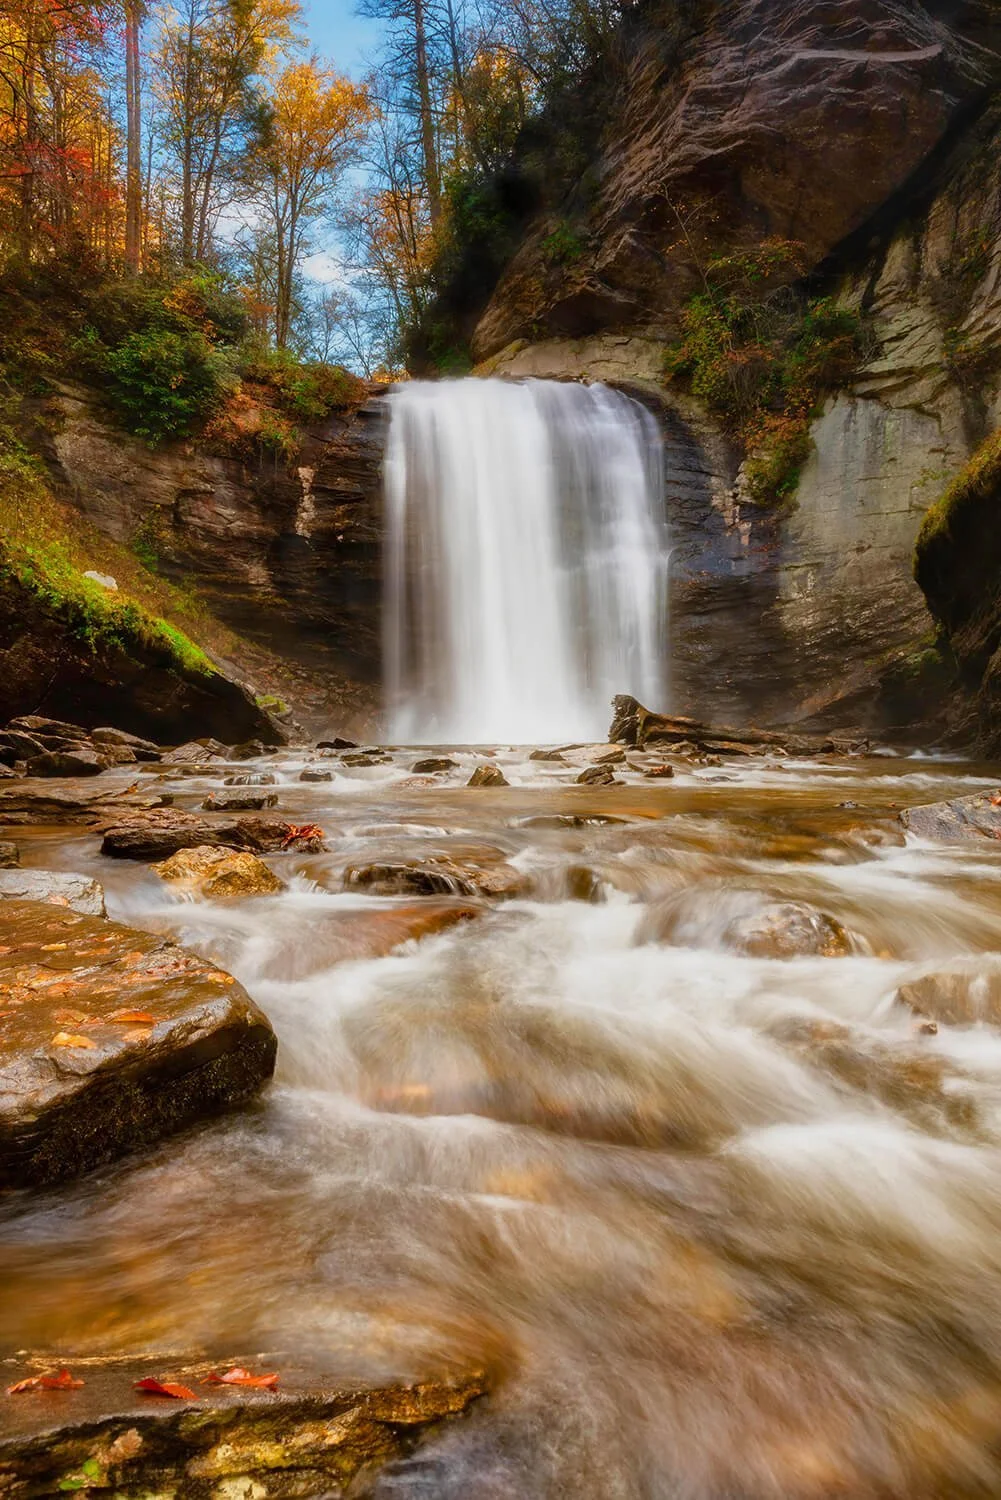
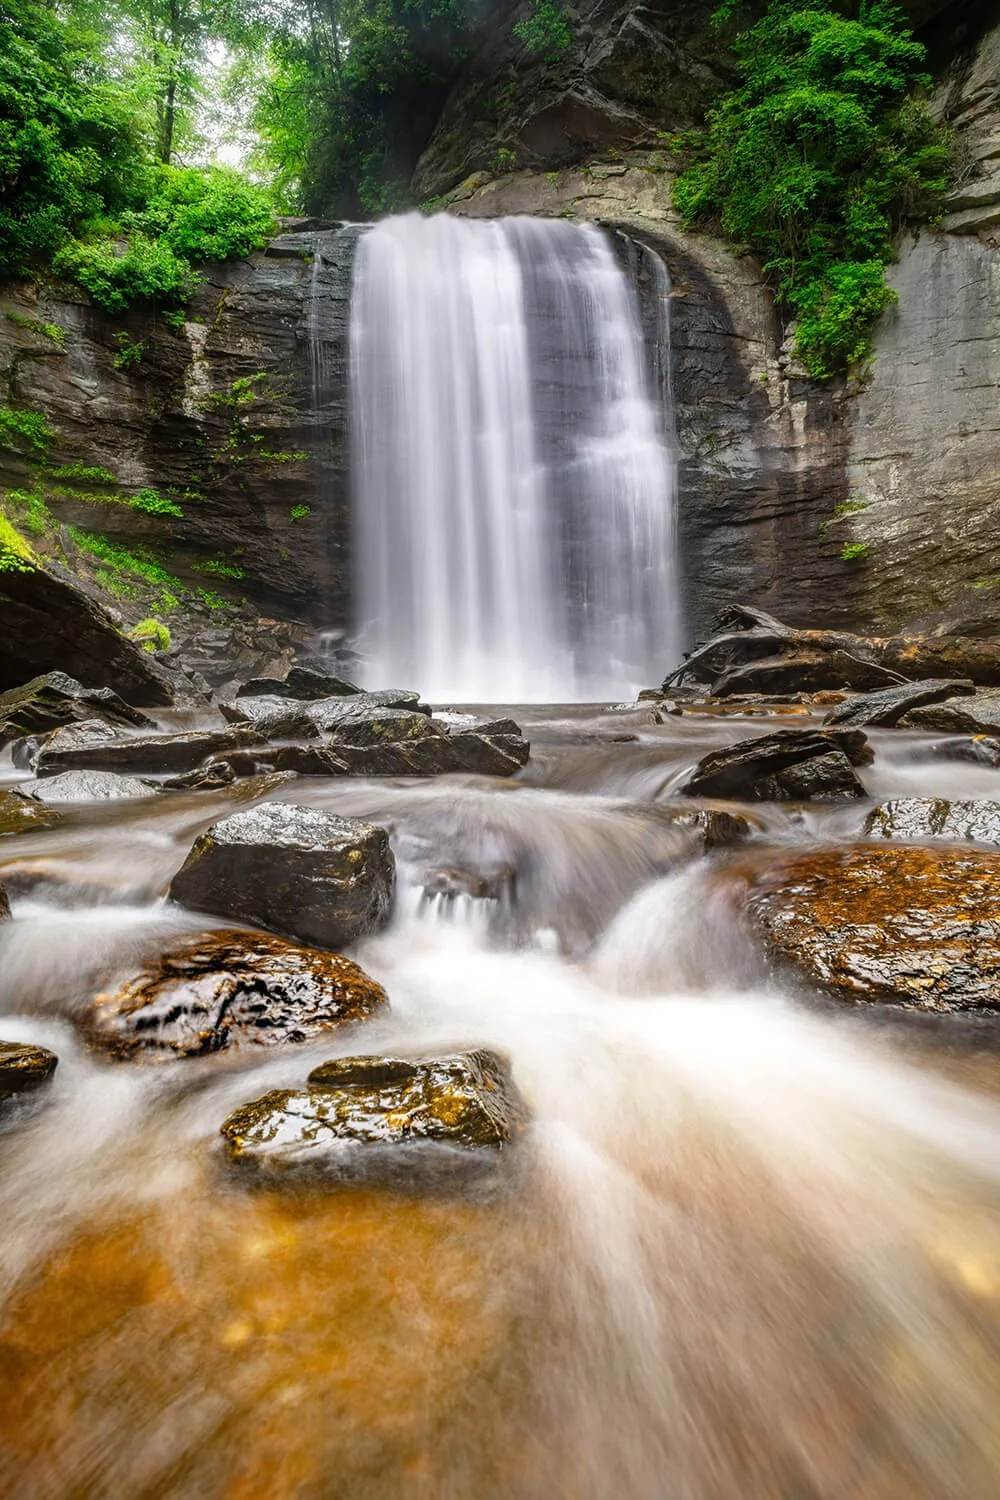
Stepping out of the confines of the lower viewing area gives free rein of the falls, rocks, and Looking Glass Creek as it flows downstream. This unlocks more composition opportunities for waterfall photography.
A big word of caution
• Those rocks are slippery!
• Navigating the rocks is hazardous for a sure-footed person.
• Add in camera gear and a tripod, and you are constantly flirting with disaster.
If you want your pictures to feature flowing water over rocks with the waterfall in the background, be prepared to wade into water up to your ankles or knees. Use extreme caution; the fast-moving water can be hazardous and easily misjudged. I always wear water shoes.
The water is cool in the summer and can be downright frigid in fall and winter; plan accordingly when visiting Western North Carolina waterfalls.
My Go-To Gear for Photographing Looking Glass Falls
I never get tired of photographing this 60-ft wonder. Here is my go-to gear for this location:
• Nikon Z8 or Z7IIwith Kirk L Bracket
• Maven Filter Set 82mm color-coded magnetic filter set (a 77mm to 82mm step-up ring is used on my Nikon 24-120mm)

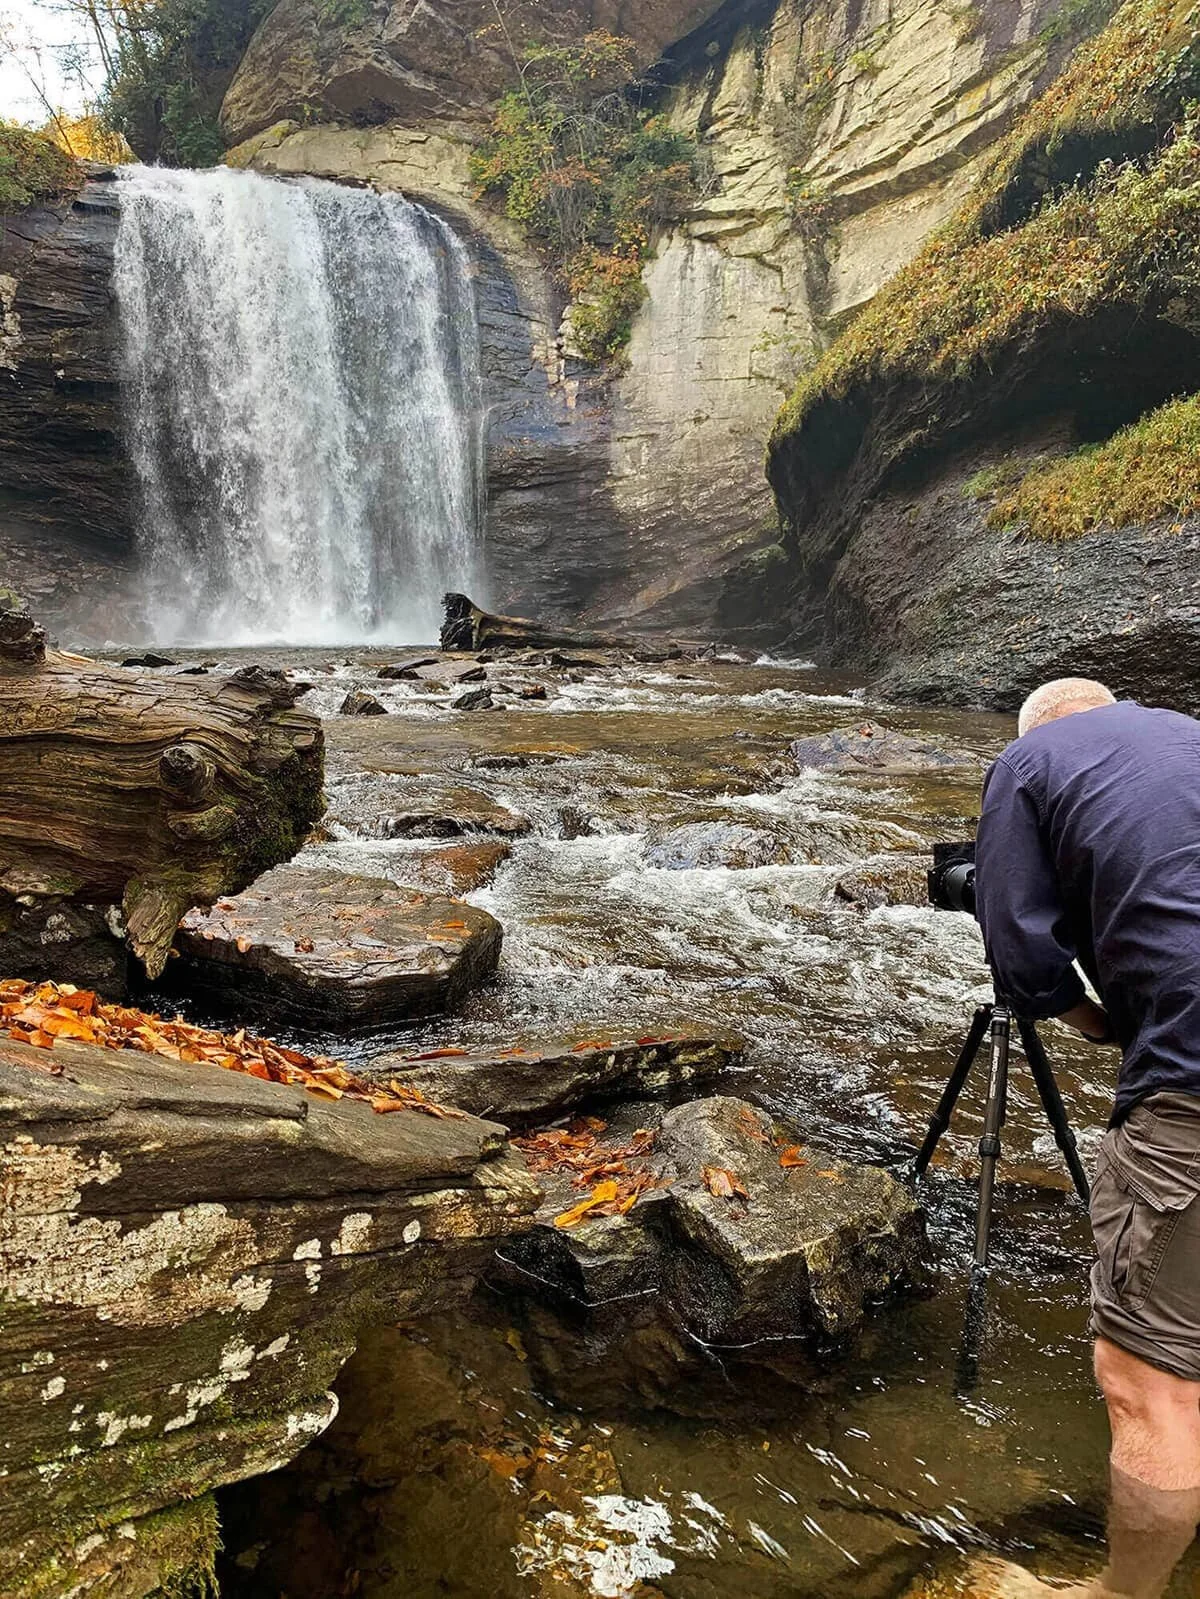
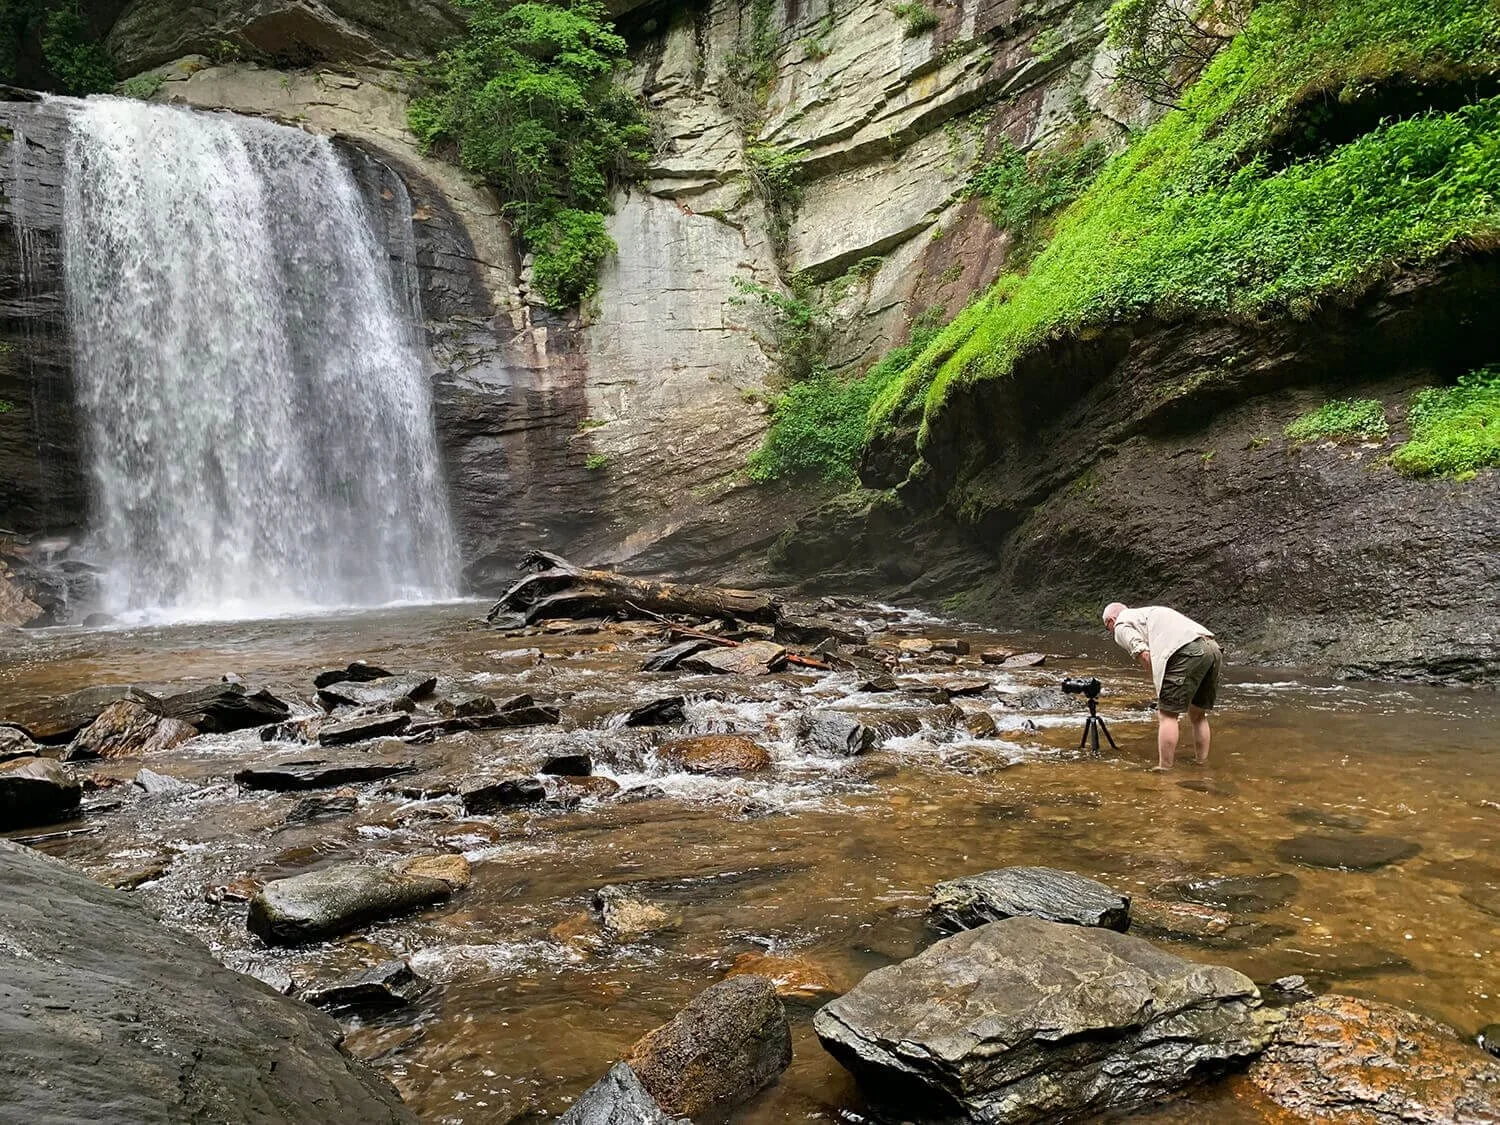
Photo Tips for Looking Glass Falls
Arrive early
Being one of the most accessible waterfalls also makes it extremely popular, and parking can fill up fast, especially on weekends. Arrive just a little before sunrise.
This gives you time to get pole position and get your gear out of your car before the crowds arrive—something essential for landscape and waterfall photographers.
Work from top to bottom
As the sun comes up, the light will increase. I like to work from the top down:
• Start at the upper observation deck
• Descend the stairs to the lower sections
• Finally, venture out onto the rocks
This also gives you a second opportunity on the way back if the crowds haven't arrived yet. Take your time and think about composition.
Be cautious once you move past the railings.
• Start closest to the falls
• Then work downstream
• If I'm moving more than a few feet, I put my camera back into my backpack and use my tripod—with legs extended—as a walking stick
Be cognizant of logs, brush, and other debris that may come over the falls. You can use composition to work around some of these.
Different rainfalls produce different water flows and give different looks downstream, looking back up at the falls—great for photographers exploring seasonal landscape variations.
Lighting tips
The sun rises over the falls, so after sunrise plus 45 minutes, light may start to get too harsh. I have found that there is always a sweet spot in the 15–20 minutes after sunrise.
Optimum lighting is probably the best in the late afternoon, but you must contend with larger crowds. Cloudy days are your friend, especially for capturing soft, even light that's ideal for waterfall photography.
A simple gear hack
I found some 24-inch fluorescent orange rubber-coated twist ties at my local hardware store that have been a real lifesaver. I use them to secure my tripod to the top of my camera backpack when it's in the side pocket of my Shimoda backpack. They are also great for attaching a pair of water shoes to the outside of my backpack.
Be sure to get a fluorescent color and not black. This makes them easy to find when laying them on the ground.
Take Time to Enjoy the Falls
Once you have finished with your photos, take 15–20 minutes and enjoy the falls. It can be very sensory-stimulating—from the sound of the water, the feeling of the water flowing over your legs, the misty spray in the air, and the fresh, earthy aroma.
As they say, "Take time to smell the roses."
I only recommend equipment that’s proven itself through early mornings, challenging weather, and my tendency to wander off trail for “just one more shot.”
Thanks for helping support what I do.